The Postman Cometh

I had all these plans for writing a long post of reflection on my Lenten vegetarian experience, and then the mail came. IMGP5289

Look, it's the summer edition of Knitscene.

IMGP5290

With a two page spread of my design!

IMGP5295

My name in print!

This hasn't happened since I got a byline as an intern for an article on August Wilson's play cycle in the Jan/Feb 2007 edition of the Goodman Theatre's OnStage Magazine (So totally different).

IMGP5296

And there it is again!

I was pretty much doing a little happy dance all night long!

Print Friendly and PDF Follow
follow us in feedly
4 Comments
Share

Meet Steinbeck

IMGP3142.JPGIt's been a bit busy around the Cleaver household for the past week, because on July the 2nd, this guy joined our lives.IMGP3141.JPG

Meet Steinbeck (formerly know as Drake). He's a 3-year old shepherd terrier mix, we adopted via Lucky Pup Rescue. This handsome fella came all the way from Texas to live with us.

IMGP3162.JPG

They say it takes a few weeks to a month for the dogs true personality to come out, but thus far we've discovered that Steinbeck is a 60-pound cuddle muffin, who wants nothing more than to sit on the sofa and be in your lap. Which is just fine with me.

IN just a week, we've pretty much fallen in love with this guy, as for what he thinks of us??

IMGP3145.JPG

Time will tell. :)

Print Friendly and PDF Follow
follow us in feedly
7 Comments
Share

Sketchbook: Designing the Carmel Clutch

As I hinted at a few posts back, I have pattern in 2010 Spring/Summer issue of Twist Collective.

It's my first professionally published pattern and I'm thrilled to be in such a great magazine in the company of designers I really admire.  I'm super excited about the whole thing, so I thought I'd talk a bit today about the Carmel Clutch came to be.

It started with a hat.

Inspiration

This hat.

Which I bought on out-of-season clearance at LL Bean a year or so ago. After I bought the hat I spent some time looking at it and realized that it was crocheted. This got me thinking, surely if you can crochet with raffia, you can knit with raffia. So I went out to a craft store on my lunch break and bought a cheap bag of raffia to give it a try.

I wanted it to have a woven looks, so I flipped through a stitch dictionary or two and came up with a swatch of herringbone stitch.

Swatch

My original swatch had a half dozen knots on the back, since the raffia from the craft store came in pieces of about 3 feet long, but it was enough to know that the concept worked.  So I worked up a sketch, named the pattern after the beach community in California that I visited a handful of times in my teenage years, sent it off to Twist, and crossed my fingers.

I got the okay from the Twist folks and we decided to work up two samples, one in raffia and one in a more standard yarn, which I was more than happy to do. While I waited for the Elann Coto Canapone to come in I ordered a few spools of raffia from Raffit Ribbons and got to work.

Carmel Clutch in Progress

Here's where you may ask, what's it like knitting with raffia? And the answer is not too bad. It's about equivalent to working with any other plant fiber yarn I've worked with (cotton, hemp, linen).

Carmel Clutch pre blocking

It's stiff off the spool and there's not a lot of give when dry and I'll admit that the purl stitches in the garter stitch sections of the bag were kinda pokey, but believe me - I've never had so much fun blocking a piece of knitting. the texture changes dramatically after it's wet and softens into something lovely!

Carmel Clutch v1.0

I had finished version 1.0 of the bag, but wasn't happy with the front flap, which was done with decreases. It was too pointy and bumpy - so I set it aside for a day to decide how to fix it. I picked up some personal knitting, and while working on a version of Laura Chau's Just Enough Ruffles Scarf, the solution presented itself to me - short rows! So I pulled out the front flap and reworked it in short rows with the addition of the garter stitch border seen in the final photos.

Around this time the Elann yarn arrived and it was Christmas and I went to California for a week and did no knitting at all so by the time I was knitting the Coto Canapone version I completely forgot to take pictures. Oops! But suffice it to say, I reworked some numbers for gauge.  We also made the second sample shorter to combat potential flopiness (which if you find is an issue with your yarn I'd suggest lining it with fabric backed with interfacing or putting a book in the bag - both work :) )

A big thanks to Twist for including me in this issue and to Caro Benna Sheridan for the lovely photos! If you have any more questions on the Carmel Clutch - let me know!

Print Friendly and PDF Follow
follow us in feedly
8 Comments
Share

My First Sweater: An Adaptation

Ponderous

Last night I finished my first sweater, just in time to show it off at my Tuesday night knitting circle.

It an adaptation of the "Anthropologie-Inspired Capelet" from peonyknits.blogspot.com. The numbers were a significant departure from the original, which was designed for bulky weight yarn, so I thought I'd post the pattern below for anyone interested in doing the pattern in DK-weight yarn. But I take no claim for this awesome pattern. All the glory goes to peonyknits.blogspot.com.

Honeymoon Mini-Cardi

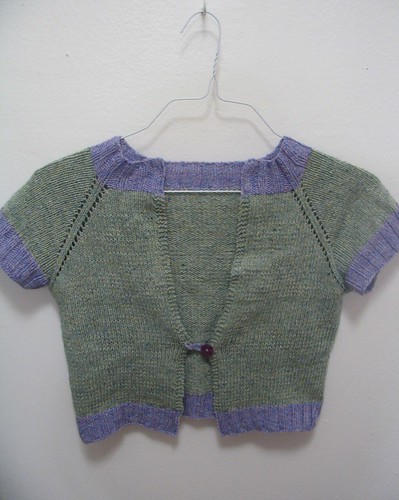
Peony Knit’s “AnthropoIogie Inspired-Capelet” Adapted for two colors and DK weight yarn.

What I Used: Size 5 (24 inch) circular and one set of size 5 double-pointed needles. MC 2 skeins Green Mountain Spinnery “Sylvan Spirit” in Peridot CC 1 skein Green Mountain Spinnery “Sylvan Spirit” in Blue Opal

Sizing: Gauge= 22 st over 4” 
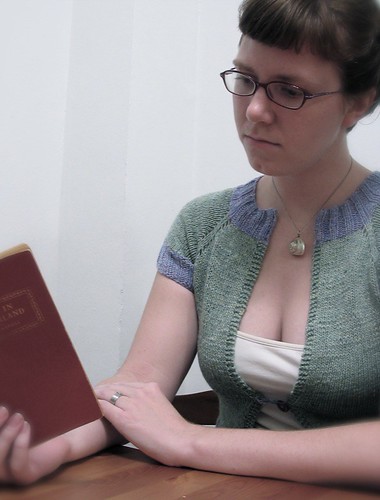
Note: I made mine to fit a 36-37” bust and 12” arm circumference

What I Did: CO 90 st (Note: If I had to make one change, I would have cast on a few more and had the front pieces be a bit wider) Knit in CC 2 x 2 rib for 2 inches to create neckline

Raglan Increases: (you will need 4 stitch markers to separate the body into 5 sections: left front, left sleeve, back, right sleeve, right front)

MC: Row 1, RS: k3, p11, yo, place marker, p2, yo, p13, yo, place marker, p2, yo, p28, yo, place marker, p2, yo, p13, yo, place marker, p2, yo, p11, k3 Row 2 and all WS rows: knit all stitches Row 3 and all RS rows: k3, *p to next marker, yo, slide marker, p2, yo* repeat from * 3 more times, p until last 3 st, k3 Continue raglan increases until sleeve measures the circumference of your upper arm. End with a WS row.

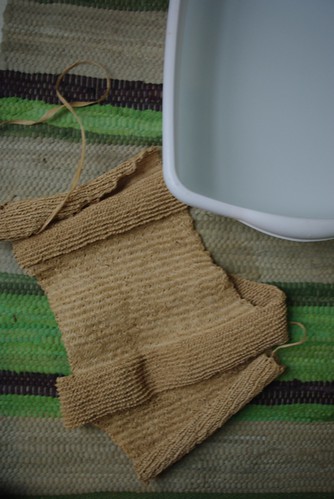
Split sleeves and body: MC: RS: k3, p to 1st marker, move all st from 1st to 2nd marker onto scrap yarn (right sleeve). P to 3rd marker. Move all st from 3rd to 4th marker onto another piece of scrap yarn (left sleeve). P to last 3 st, k3. WS: Knit all st 
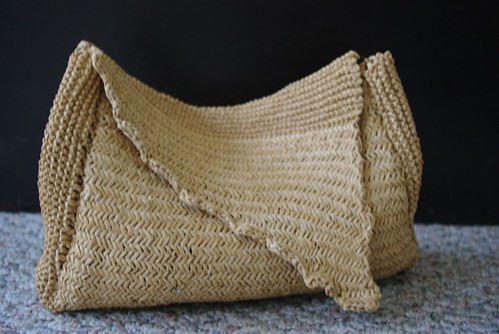
Continue in reverse stockinette stitch (with k3 at each edge of the row) until desired length, ending with a RS row (I went until I ran out of MC)

CC: Knit 1 row. Switch to 2 x 2 rib, for two inches. BO all st

Sleeves: CC: Pick up all st unto doubled pointed needles, one sleeve at a time, from scrap yarn. Knit 1 row. Switch to 2 x 2 rib, for two inches. BO all st Repeat for second sleeve.

Finishing Weave in all ends. Add a button/pin as desired and enjoy!

Please note that all patterns and tutorials are for personal use only and should not be distributed or produced for sale without the written consent of the author.

Happy Thanksgiving everyone!

Honeymoon Mini-Cardi
Print Friendly and PDF Follow
follow us in feedly
13 Comments
Share

Simple Stuffed Animal Knitting Pattern (or One thing leads to another, and another, and another...)

Kitty in Chair

I learned, somewhat begrudgingly, to knit about two years ago. I was interning with a theatre in Maine and by the middle of the Christmas Carol run, all eight of the other interns, including the lone guy, were knitting scarfs and hats like a nuclear winter was on the way.

I was pretty much the lone hold out. My grandmother had taught me to knit a slipper about ten years earlier and I lost interest about halfway through the second one and all my relatives lived in warmer areas of California where they had no need for scarves, so I really didn't have a reason to start knitting, in my opinion at least.

One of my fellow interns, disagreed however, and for our secret santa exchange gave me a learn to knit a teddy bear kit. It started an obsession.

Mr. Cleaver and his Bear

I knitted the kit bear. Then I knitted a large blue bear for Mr. Cleaver. Then I knitted some leg warmers for my dance class and learned to knit in the round. Then I had some grey yarn I had used for the blue bear and my cousin was having a baby, so obviously I knit an elephant.

Elephant

And then I had leftover pink from the elephant's ears and my best friend was having a baby, so obviously I knit flying pig.

Pig Butt!

Then I showed by brother (who also knits) this awesome knitted Yoda at boyknitsworld. He wanted to make one, but there's no pattern, so I told him I was pretty good with the stuffed animals and could probably figure it out. I still had a lot of pink yarn left (it was one of those big cheapo polyester skeins - which is why I don't exactly know how much yarn this takes), so I decided to use it to make a prototype, but as a cat for another friend with a baby on the way. Change the colors and the ears, and BAM! - Yoda or Bear or Mouse or Baby or Alien. I was a fool and never wrote down the patterns I made up for the pig or elephant, but I did write down this one.

Stuffed Creature Pattern: Size 7 straight needles Stuffing Tapestry Needle Yarn - 1 skein? A small amount of contrasting yarn for face and accessories.

BODY (Make 2) Right Leg: Cast on 8 stitches. Knit 20 rows. Cut yarn and leave leg on needle.

Left Leg: Cast 8 stitches on the needle with the right leg on it. Knit 20 rows. Both legs should be on the same needle.

Legs!

Attaching the Legs: Knit across 8 stiches. Make 8 stitches by looping yarn over the needle so the tail is on the inside of the loop.

Making extra stiches.

Knit across 8 stiches. Legs should now be connected by the new loops. There should be a total of 24 stitches. Knit 24 rows.

Legs connected

Shaping the Body:

Bind off 1 stitch and knit across row. Repeat 8 times until 16 stitches remain.

Bind off 4 stitches and knit across row. Repeat 2 times until 8 stitches remain.

Knit 1 row for the neck.

Shaping the Head: Make 4 as before, Knit 8, Make 4. Knit 1 row. Make 1, Knit across, Make 1. Repeat 6 times until there are 28 stitches. Knit 20 rows. Bind off 1, Knit across, Bind off 1. repeat 8 times until 16 stitches remain. Bind off.

Sew two halves of body together, using a whip stitch, leaving an opening for the stuffing. Stuff to desired cuddliness (I like to give them a potbelly!) and sew closed the opening.

ARMS (Make 2) Cast on 20. Knit 20 rows. Bind off.

Fold each arm in half and sew bottom and side together to form a tube. Stuff and sew unto body at appropriate location.

Kitty face

EARS/TAIL/ETC.

Knit ears and tail to reflect whatever creature you desire. Sew on face, whiskers, freckles, whatever. Make accessories as desired. This thingy is infinitely adaptable and adorable.

Please note that all patterns and tutorials are for personal use only and should not be distributed or produced for sale without the written consent of the author.

Print Friendly and PDF Follow
follow us in feedly
2 Comments
Share

Sadie Sadie

I am a married lady.

Marrige is, I think, a little like New Year’s - you get a kiss and a whole new chapter of your life begins.

A new husband, a new family, a new name -- as good a time as any to start new things.

A blog for instance.

Print Friendly and PDF Follow
follow us in feedly
2 Comments
Share