Tried and True Review: Flowers and Lace Skirt

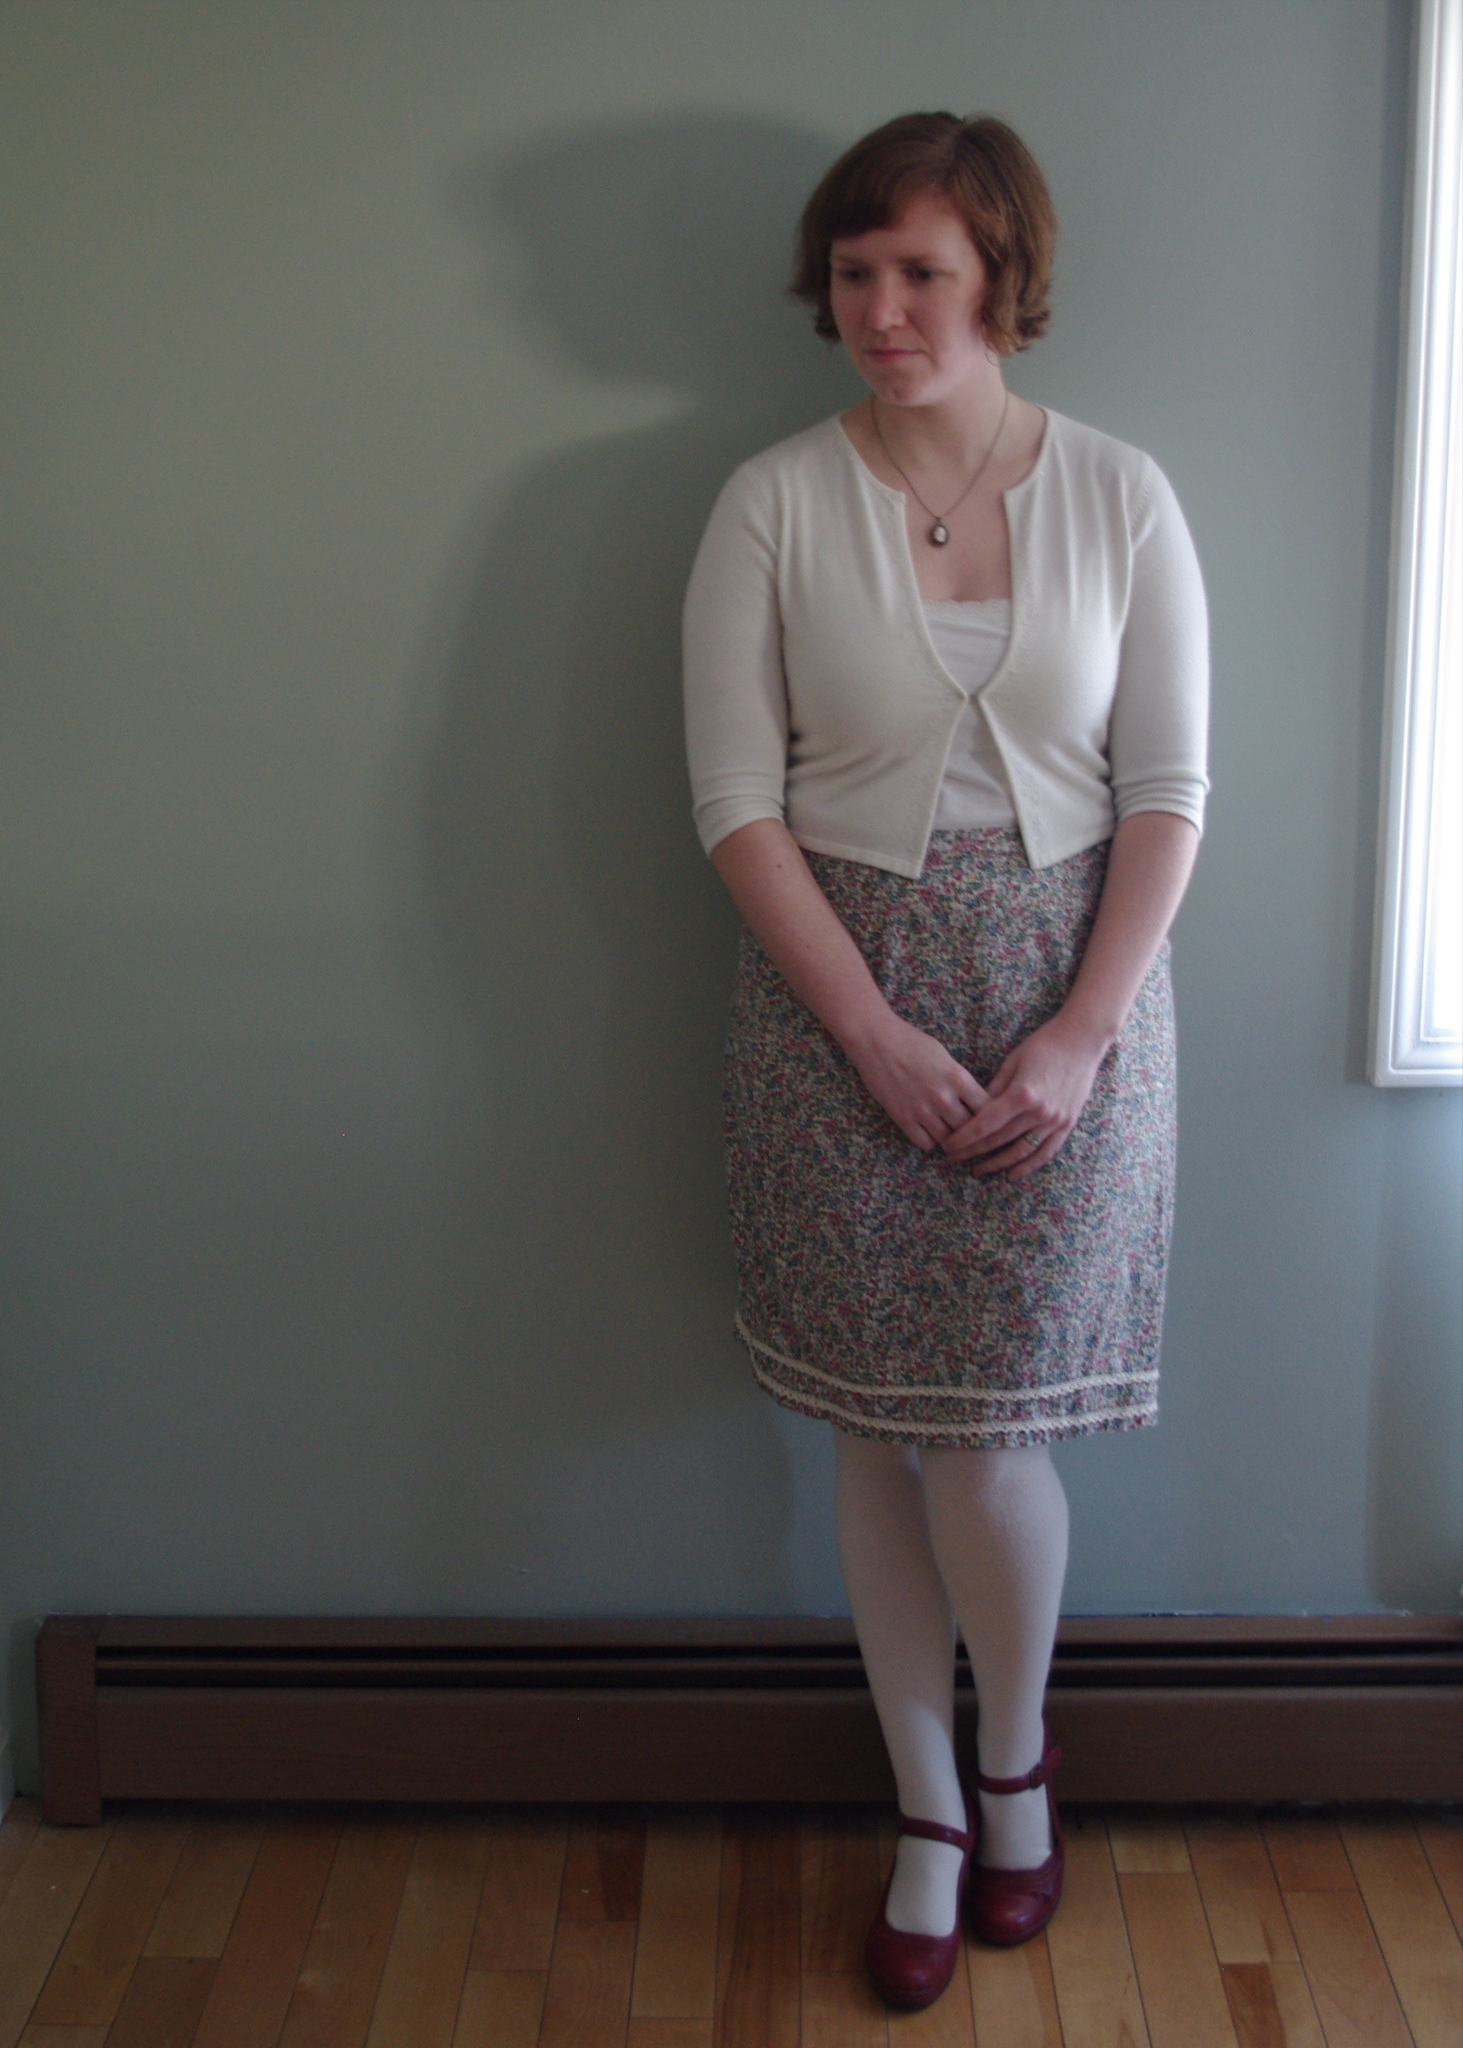
Granny Skirt 2011 made by Ms. Cleaver
Granny Skirt 2010 made by Ms. Cleaver
Granny Skirt 2015 made by Ms. Cleaver

A Tried & True Review, where I look back at old project and discuss how it's held up since I made it, both successes and closet rejects, in an attempt to show how my projects have stood the test of time and/or to learn from the mistakes of my yesterdays.

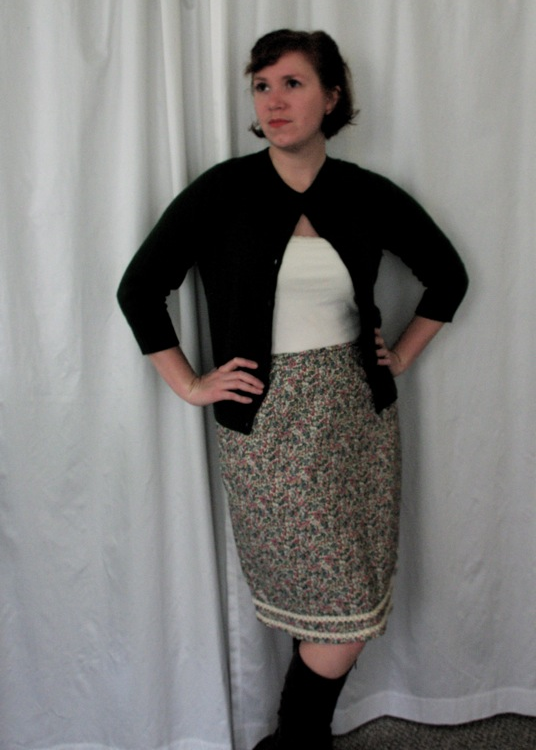
The Original: Floral and Lace Skirt

Made: March 2010, 5 years old

Update: This is my go-to skirt when I want to look ladylike, but be comfy. (see also: "No Pants" Lent 2011)

Fit: It was self-drafted, with a pretty forgiving fit. That said I did (upon originally making it) do an adjustment to the waistband. The waist line has moved up and down as my weight fluctuated over the years, but it's managed to hang in there.

Style/Materials: A super basic a-line skirt, in a  floral fabric and lace. This was a free piece of  quilting cotton given to me by my mother-in-law, along with some cotton lace trim from my stash. It was pink and had tiny flowers all over it, which is not very me. Nothing about it should work, but it just does. 

Construction: The waistband fix was some darts I put into the finished waistband, so a little wonky there. Also, since it was meant to be a muslin, I didn't interface the waistband, which means its always crinkly, but probably contributes to the comfy factor of this skirt.

Lesson(s) Learned: .Really small prints are quite versatile and never underestimate the power of simple and comfy!

Final Verdict: I never would have imagined that I would still be wearing this skirt five years after I first sewed it up. It was meant to be a wearable muslin for goodness sake! I still have the draft pieces somewhere, so I should make another version, no?

Print Friendly and PDF Follow
follow us in feedly

Happy Birthday TWO you!

Little Miss Cleaver is officially two! And as timing would have it, her birthday fell on Maine Maple Sunday - so it was a BIG day for a big little girl.

We kicked things off with cards and presents from Mom and Dad in the morning. She decided to open the books first, with Nothing Like A Puffin eliciting a demand for Daddy to "Read it." But as great as books are,  it's hard to say what was the bigger hit, her new tool box, or the new playhouse.

Follow my trend of Pinterest-inspired projects, this playhouse tutorial worked out pretty well. Two extra-large moving boxes from U-Haul, one roll of colored duck tape and about 40 minutes of cutting and taping, produced what can only be called a new favorite hangout. I wanted it to be big enough for her to stand up in and this just barely made it. It's a tight squeeze when I'm asked to go in, but it's a perfect fit for her.

As we have for the past few years, we drove up to Sebago for a pancake breakfast at the town hall and then a quick jaunt to Grandpa Joe's Sugar Shack for the warm syrup on ice cream and sugaring demonstrations. It's always cold on Maine Maple Sunday, but this year it was really cold, so we spent most of our time huddling by the evaporator. And since it hasn't really warmed up yet, there wasn't much sap to boil, and we picked up the last pint of syrup they had (sorry everyone else!).

If we weren't sugar-ed and present-ed out from the morning, we had applesauce cake with maple buttercream frosting and more presents with Memere after naptime. LMC's uncle made the stuffed monkey, which is entirely hand-stitched and amazing.

I'm a sucker for traditions and in moments like these, those traditions really bring to the forefront how much LMC has grown and changed since last year and how much I've grown and changed over the many years I've been visiting sugar shacks and eating pancakes. 

When my mother moved out of her house a few years ago, my brother, at my request, tossed 2 milk crates of my journals and sent about 8 years of my scrapbooks from my middle and high school years. I shelved the scrapbooks and have only recently been looking at 1998 a lot, because LMC likes the Winnie the Pooh cover.But looking back at that year, i doubt that girl would have any inkling who and where she'd be now and how she'd be so different in some ways and how very much the same in others. 

With LMC its such a fascinating process as a parent to watch her grow and become more independent and opinionated and more herself and to wonder, which of these things will stick and what will change? Will she always love fixing things or will it go away along with the preference for pink socks? Or will the pink socks be a signature style? I can only hope that as a parent, I give her the room and support to explore and find out for herself.
I've packed away the birthday crown for another year, but I look forward to seeing who LMC will be when she wears it again.


Print Friendly and PDF Follow
follow us in feedly

Design Diary: Lady Heartrose - Grading and Calculations

Design Spreadsheet by Ms. Cleaver

I've always considered one of my greatest strengths to be the fact that I'm pretty much equally right-brained/left-brained, analytic/artistic, or concrete/creative. 

While it makes me a great utility player, this dichotomy has it pros and cons. When I worked in a primarily creative environment, the highly creative folks pushed me into more administrative positions, but now that I work with primarily analytic people I get to do all the fun wacky creative things. It's been much more rare to find something that scratches both those itches, however.

And then I met knitwear design...

Textiles and drawing and geometry and Excel spreadsheets! When I design a sweater, I get to do it all.

As many designers will tell you, making something in one size is easy (especially if it's your size), making it work across 8-10 sizes? That's the difficult part and the reason why you'll see so many free patterns that are one-size only.  

Grading can be terribly time consuming, but I derive genuine pleasure from a well-designed Excel spreadsheet.At it's most basic, the spreadsheets take the body measurements and translate them to stitch counts based on my swatch, but after 5 years of designing, my template sheets have gotten increasingly complex and sophisticated and I'm pretty pleased with my latest iteration.

My sizing is all based on ASTM International Standards for Body Measurements (from a few years ago), which gives me more confidence in my sizing than when I was mushing it together from various sources.My current version also shows ALL my calculations (See the screenshot for an example), as well as regular confirmations that I'm still on stitch count and within my desiring sizing.

It helps me make sure I'm not missing anything and is a helpful bit of information to have on hand for tech editors and pattern support requests, especially when the latter comes months or years after I released a design. 

At this point is also when I lock down the nitty-gritty of the design details - width of the button band, depth of the ribbing at the sleeves/hem etc. My highly scientific method for determining these? Holding my index finger and thumb apart to what looks like a good width/depth and measuring the space with a ruler, making sure it looks relatively proportional to my sketch. Similarly when it comes to ease, I take a cloth tape measure and myself or a mannequin and see what looks right and matches the sketch. For this pattern, I wanted the hem to be fairly swingy, so there's 7-10 inches of ease at the hips (with the larger amounts at the top of the range). 

 It often feels like overkill to do the full grading before I cast on, but I like my instructions to flow fairly smoothly from one size to the next, so if I have to make a bunch of adjustments to half the sizes, I try to even it out across the size range as much as possible. Of course, that's not to say I won't calculate a portion (like the body) just to be able to cast on - I'm only human after all.

Any questions about the grading process? My favorite Excel formula? The trickiest bit to calculate? Put them in the comments below!

Next up - Sample Knitting!

Print Friendly and PDF Follow
follow us in feedly

Little Miss Cleaver had a Farm

Play Barn - Made by Ms. Cleaver

LMC's 2nd birthday is fast approaching on Sunday, but since she doesn't read this blog I can give you a sneak peak of one of the presents I made for her.

Do you make stuff from Pinterest? I know a lot of people that cook from it, but not a lot that actually do projects, per say. It's definitely been the inspiration behind a few things for me, like LMC's first Halloween Costume, and this past Christmas' Advent Calendar.

This gift is really a follow-on to that advent calendar - every since she got all the farm critters in the calendar, she's been playing with them constantly and I thought it would be nice to give them a little home (and if it means less searching for a missing tiny horse or chicken for me, well, that'd be nice too.).

The barn is based on the tutorial from here.

It's a tutorial and not a pattern, so there's a certain portion of the instructions that involve winging it, particularly in respect to cutting out pieces and seam allowances and even then I made a few changes.

  • Pleated the roof portions
  • I cut out and sewed the batting pieces together, rather than the wrap/and tape method - if I were to do it again, I'd just interline the fabric pieces with the batting and save myself a bunch of trouble.
  • I didn't sew the fold lines. They folded fine on their own, I didn't want the thread lines showing and I'm not that worried about the plastic canvas sliding.
  • I did all the applique (by machine) before I sewed the pieces together, and just marked the stitching lines on everything so I didn't put a door where it'd get half cut off.
  • I'd also make the button loops tighter/smaller next time.

For materials I bought some deliciously soft red brushed flannel and the white twill tape for the doors/windows specifically for the project and everything else was leftovers from other garment projects (wool, linen, twill, and corduroy).

I'll note that this is a fairly time-consuming project. It probably took me 3 naptimes to complete. Though that was mostly the applique and getting the pieces cut and arranged, the actual structural assembly went fairly quickly.

My finished product isn't quite as sharp-looking as the tutorial mostly because I was a bit loosey-goosey with the seam allowances, but I think LMC will like it all the same - I certainly enjoyed playing with it to take these photos! And come-on, it's a tiny carry-along barn with a path and pond! It's pretty stinking adorable.

Print Friendly and PDF Follow
follow us in feedly

Design Diary: Lady Heartrose - Swatching

Heartrose Swatches by Ms. Cleaver
Heartrose Swatch by Ms. Cleaver

Usually I sketch before I swatch, but in this case, since I worked a little backwards.

The yarn here is Swans Island DK Washable Wool Merino in Malbec. The original child's cardigan was in a hand-dyed fingering weight washable wool from the Woolen Rabbit. For the grown-up version I wanted something with similar properties, but in a slightly larger, more knit-able, scale. For that, the Swans Island was a perfect match, with the Malbec a nice feminine, but grown-up colorway.

[Full disclosure: I had ID'd this as my dream yarn a while back, and then earned access to some  yarn support from Swans Island following the publication of my  Breakwater Pullover].

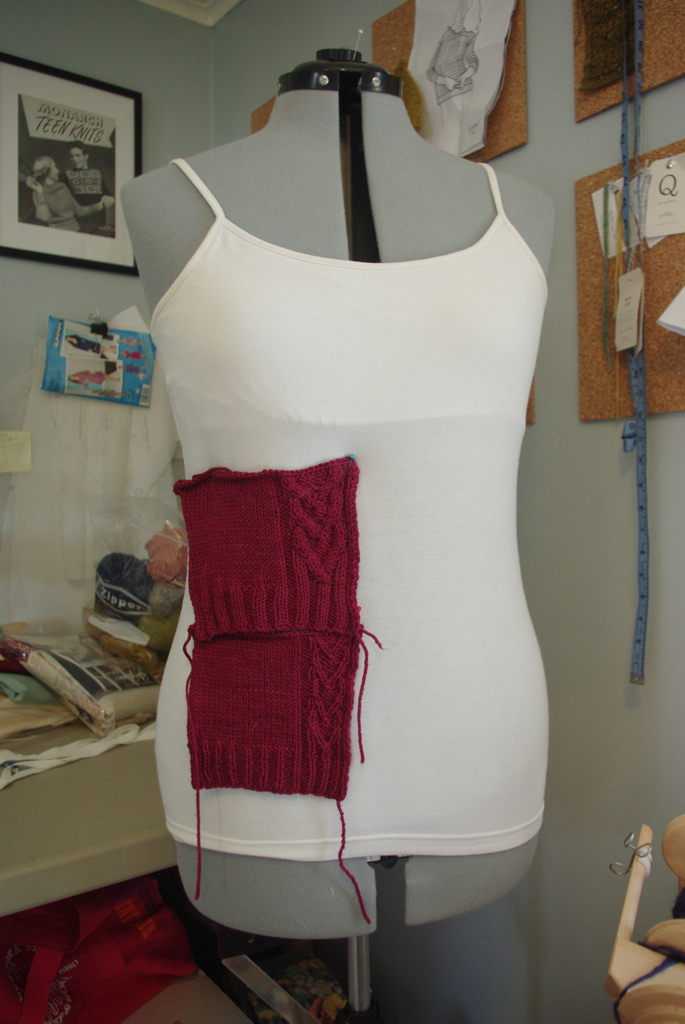
Unless I know I want a particularly dense or flowy fabric, I generally begin swatching with the needle size indicated on the ball band. The swatches here are done on US 6/4.0 mm and US 7/4.5 mm. I learned to knit on size 7 needles, and as such, I've always had a bit of a soft-spot for them.

While the 7s resulted in a bit looser fabric, the main difference in these swatches is the scale of the cable pattern. The size 6 swatch uses the same cable pattern from the childre's cardigan, while the size 7 swatch doubles the thickness of the rib and cables. 

I gently washed and blocked both swatches (just flattening and not stretching), which is extra important in super-wash yarns, which I've found have a tendency to grow. Then I pinned on various place of my unnamed dress form  to see how it hangs and feels in scale to the body. Unless I'm doing a sample for a publisher, I usually keep the form at my own measurements, which is a 38-39" bust. 

Scale is the key here. If Lady Heartrose was a fall/winter cardigan, I'd go with the thicker version in a heart-beat, but for a spring/summer garment, I want something more delicate, so the thinner cable it is. The size 6 fabric also just looks a bit "cleaner" to me, so size 6 swatch wins overall!

Next up - practical math and complex spreadsheets!! 

Print Friendly and PDF Follow
follow us in feedly

Works in Progress

Tea and Quilting
Quilt Top
Hand-Quilting
Fort Building
Good Night Sleep Tight Embroidery in Progress by Ms. Cleaver
Sock in Progress
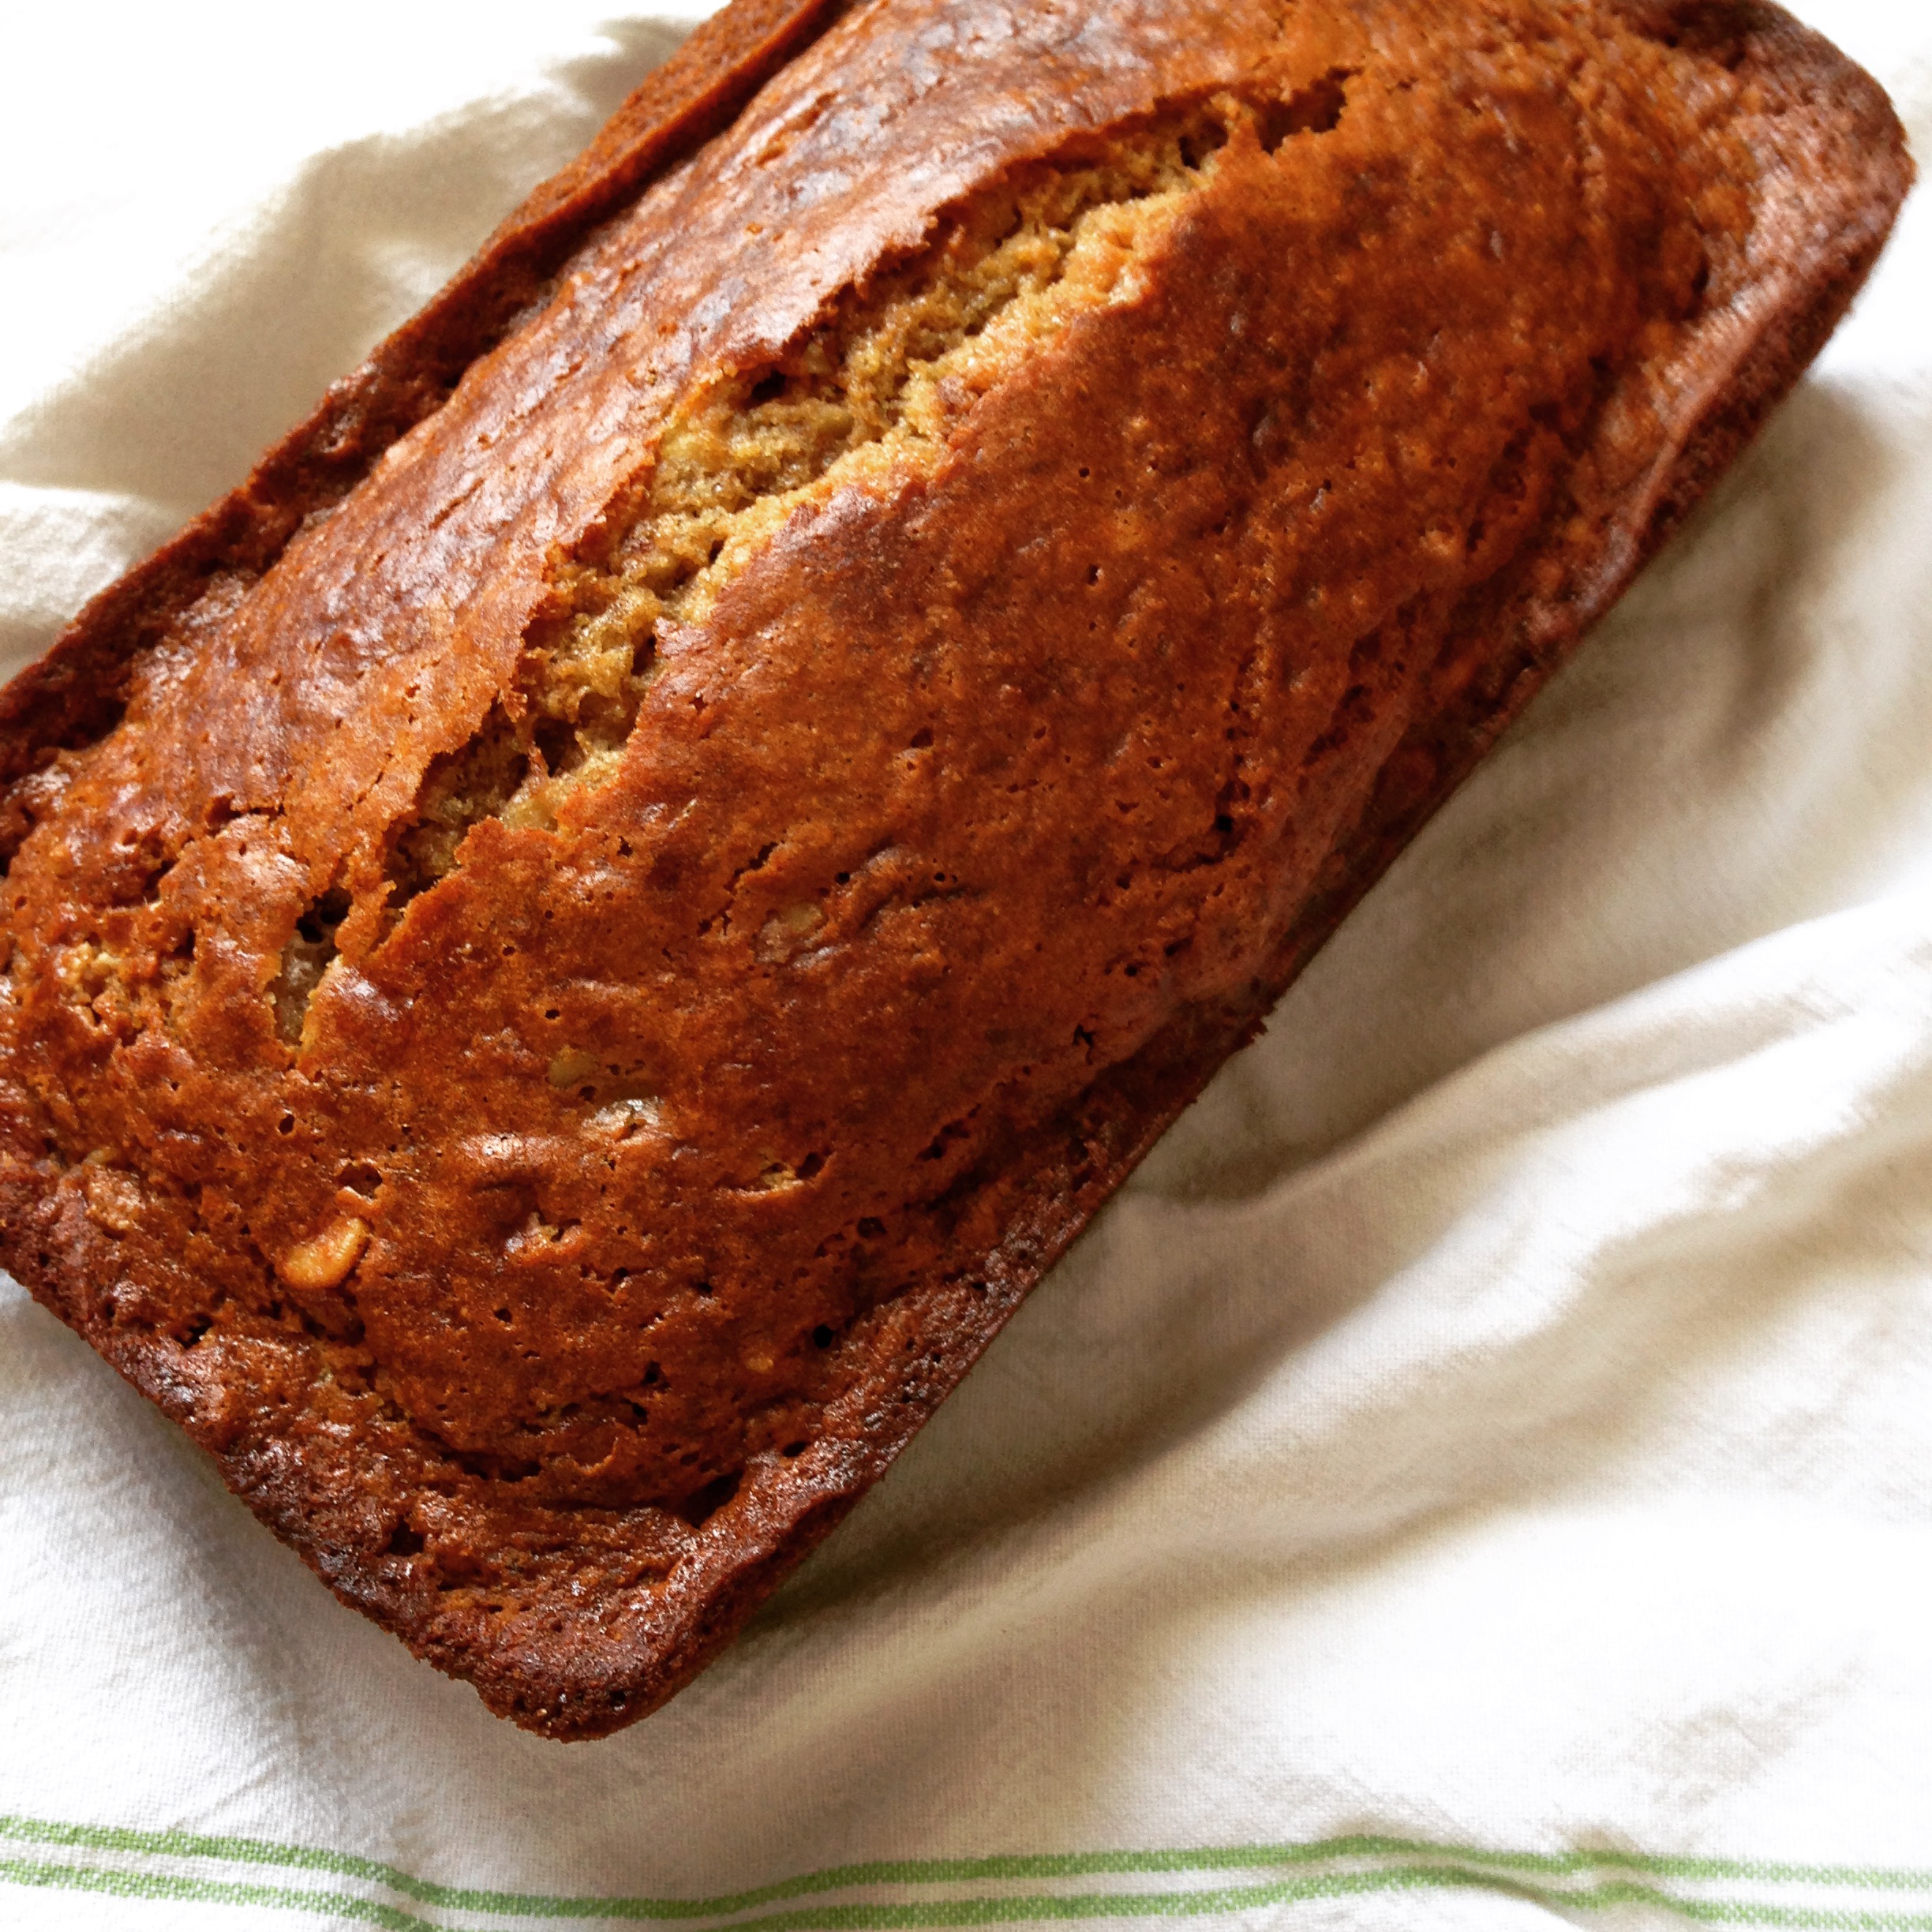
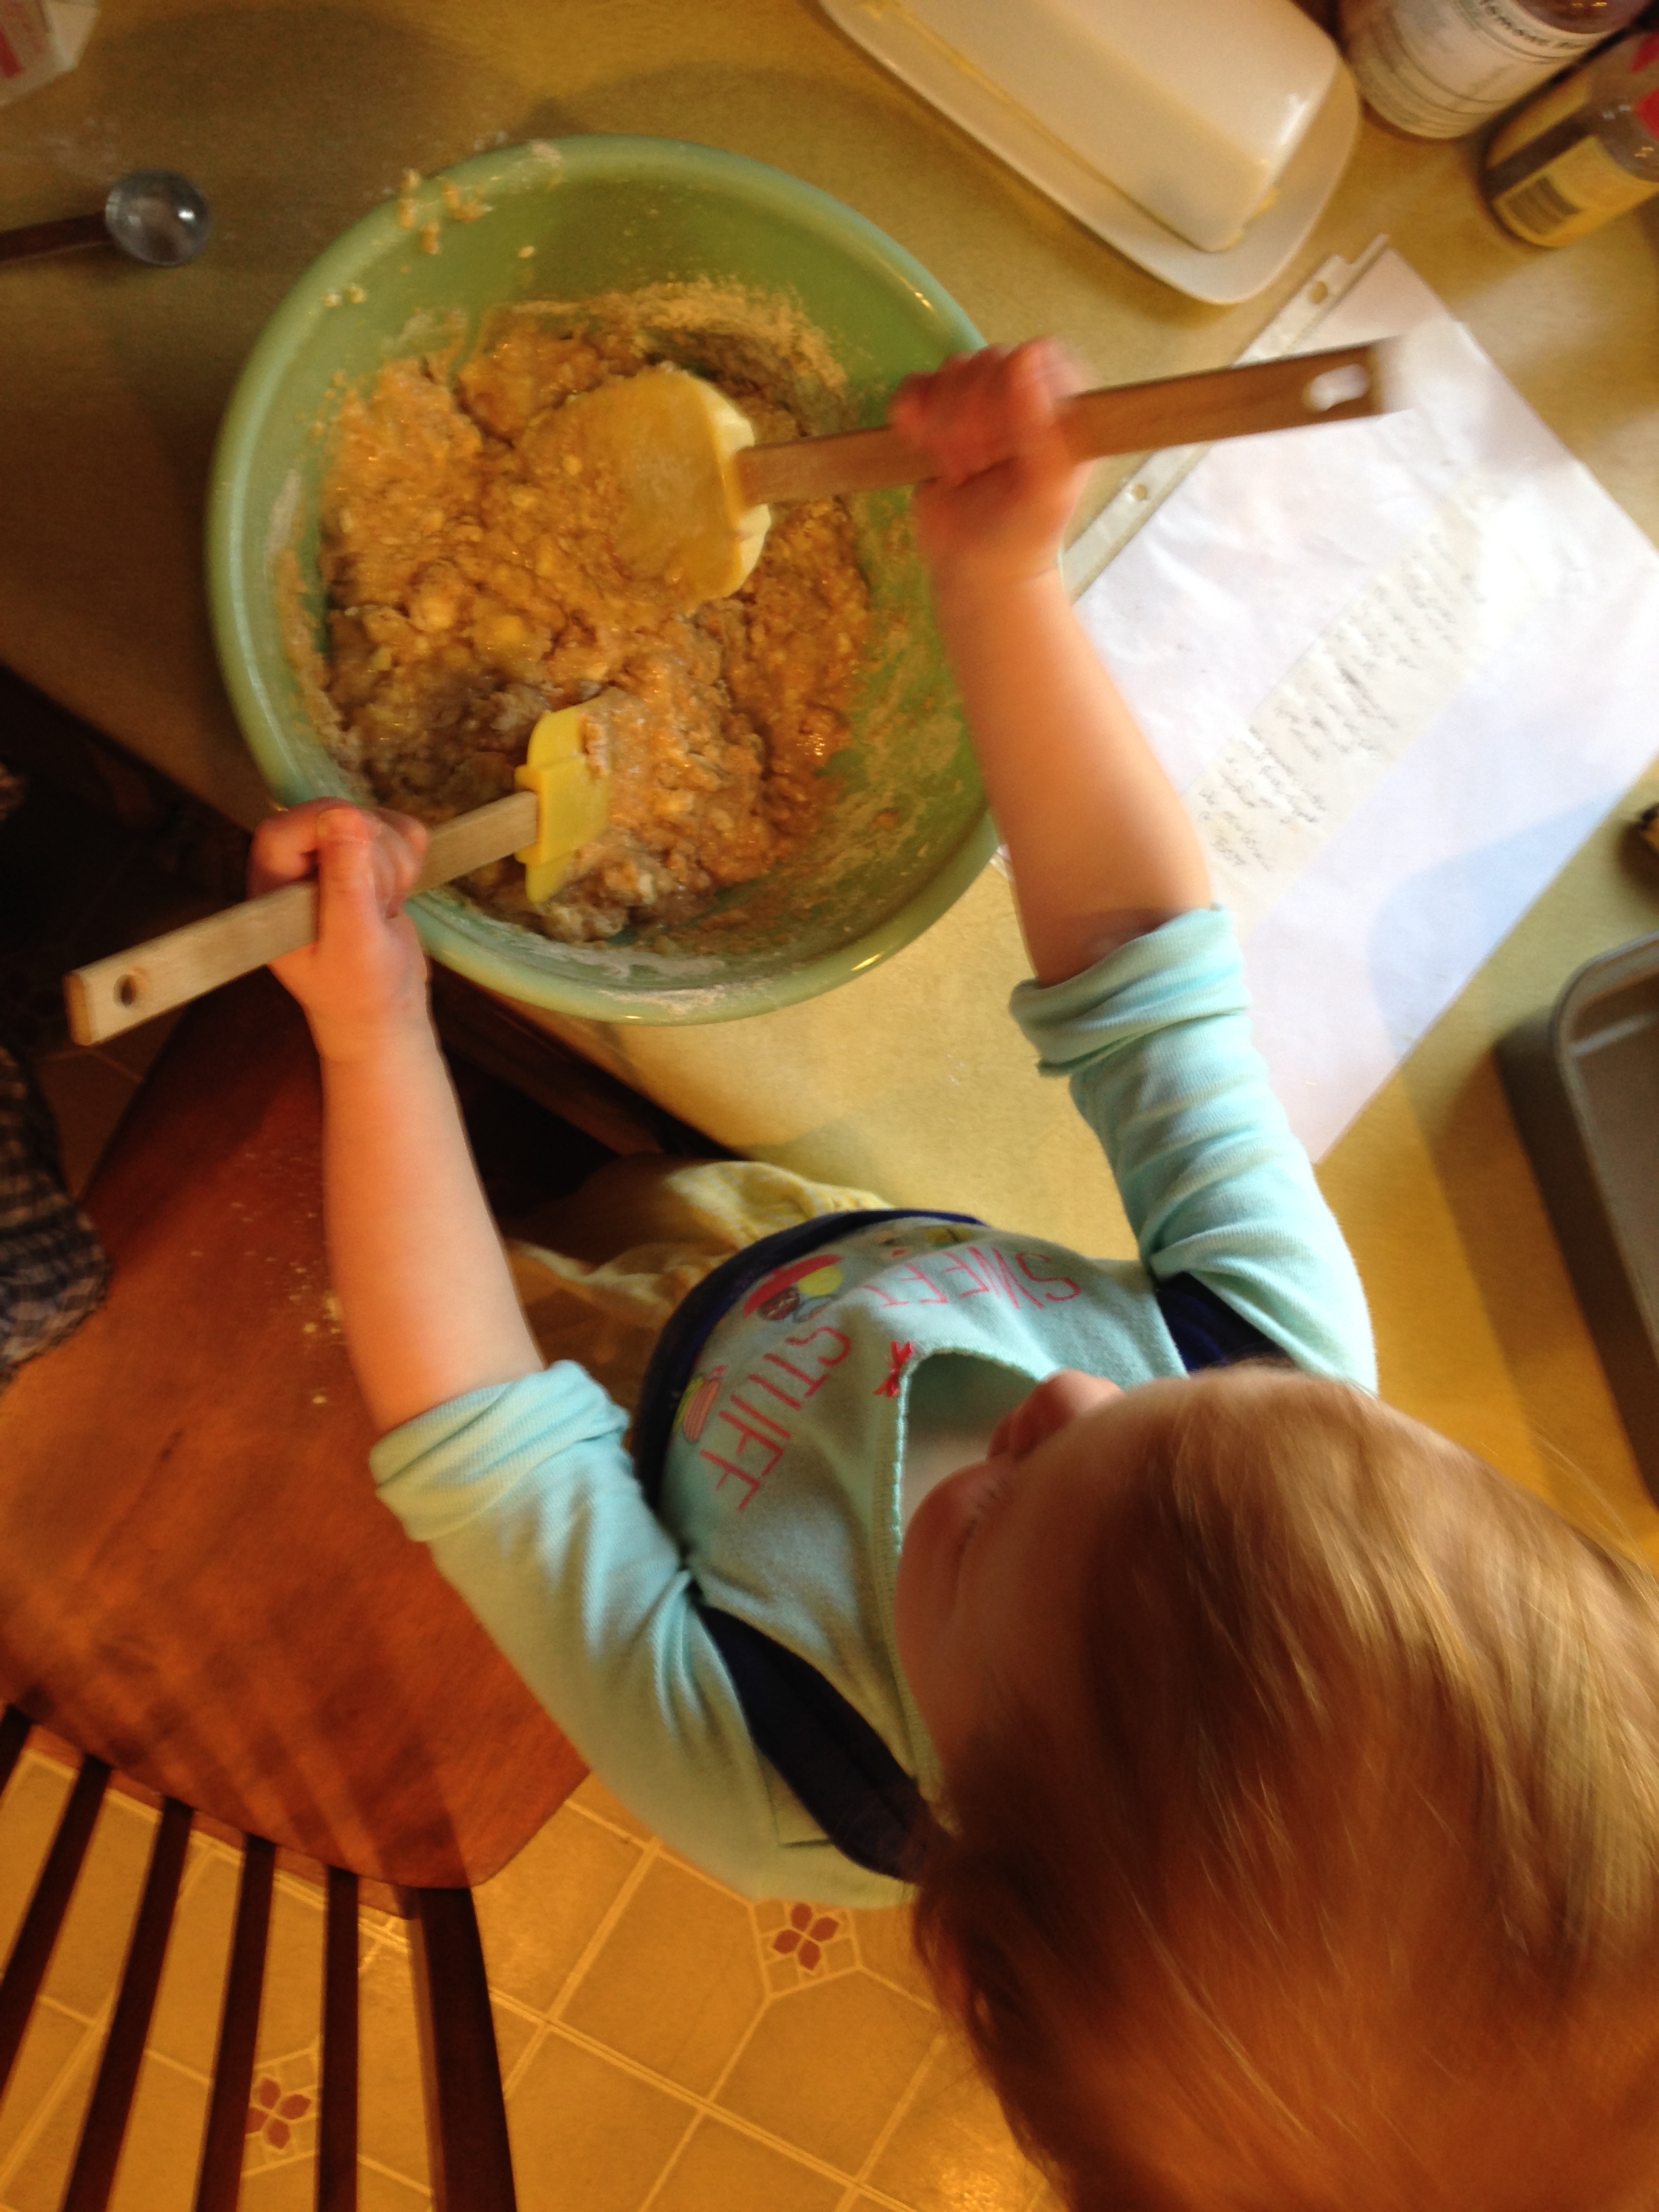
Banana Bread
One Bowl Banana Bread with Two Spatulas
Cleaning Up
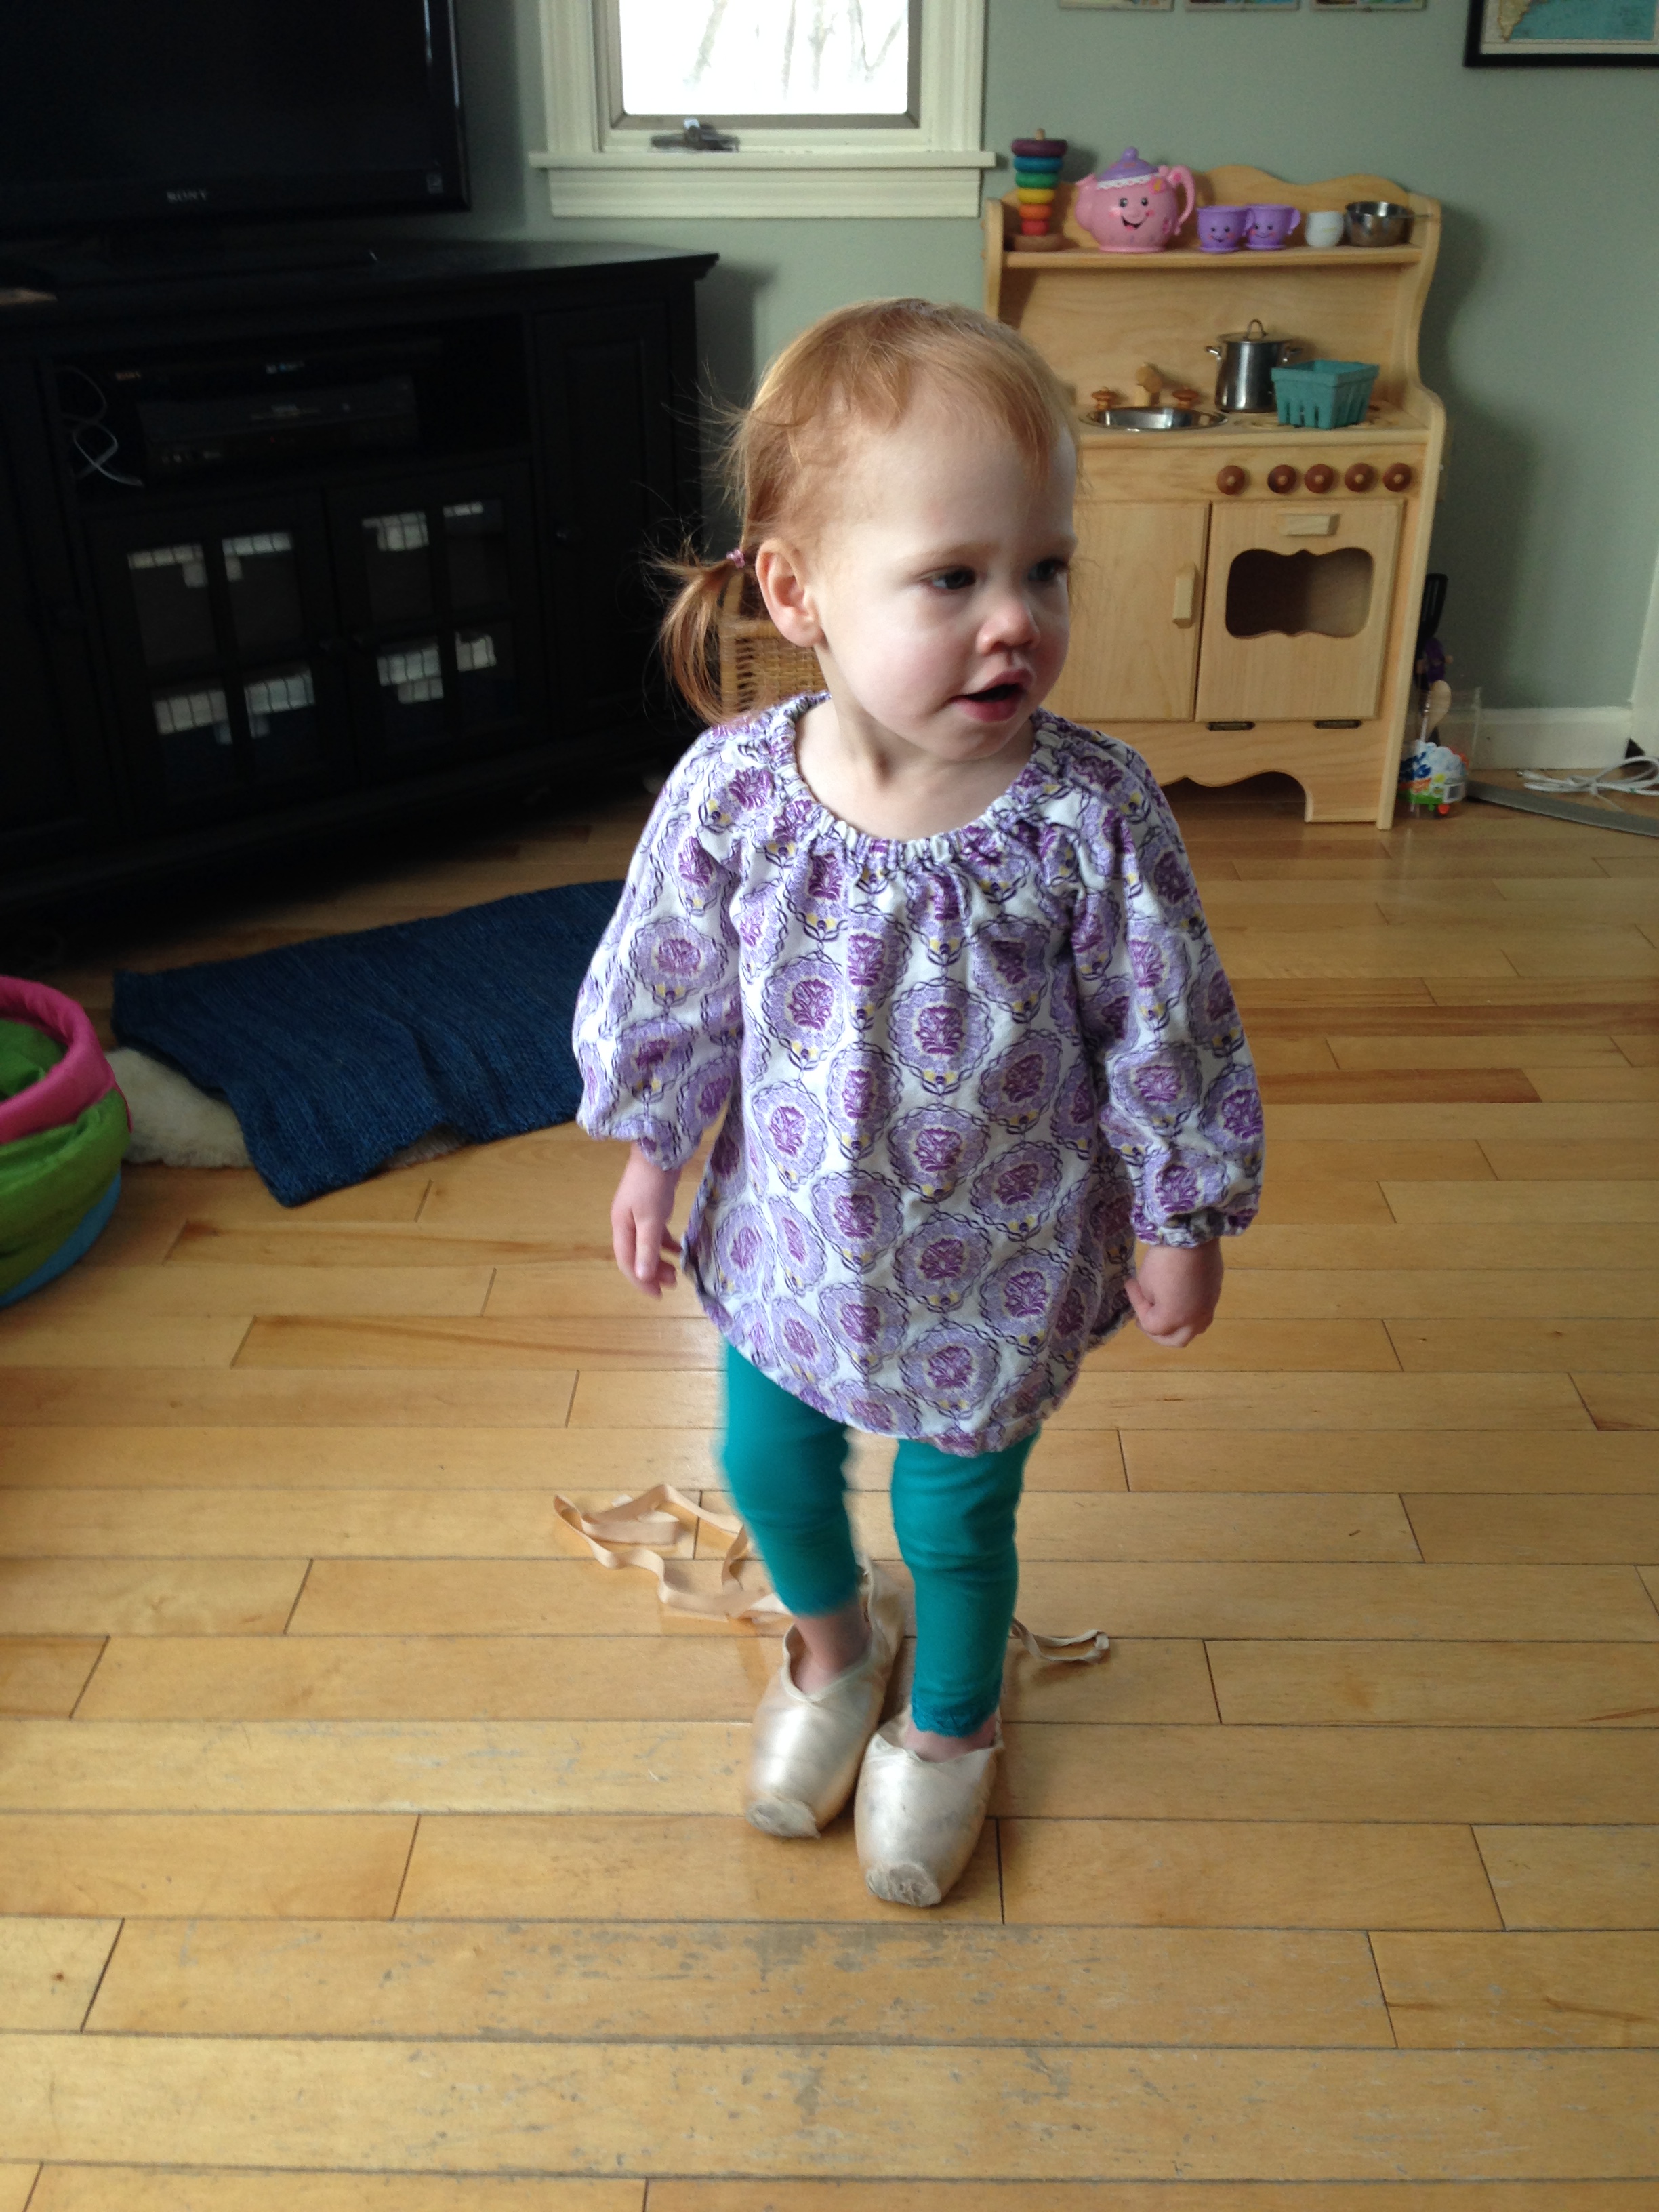
Mommy's "Ballet Shoes"

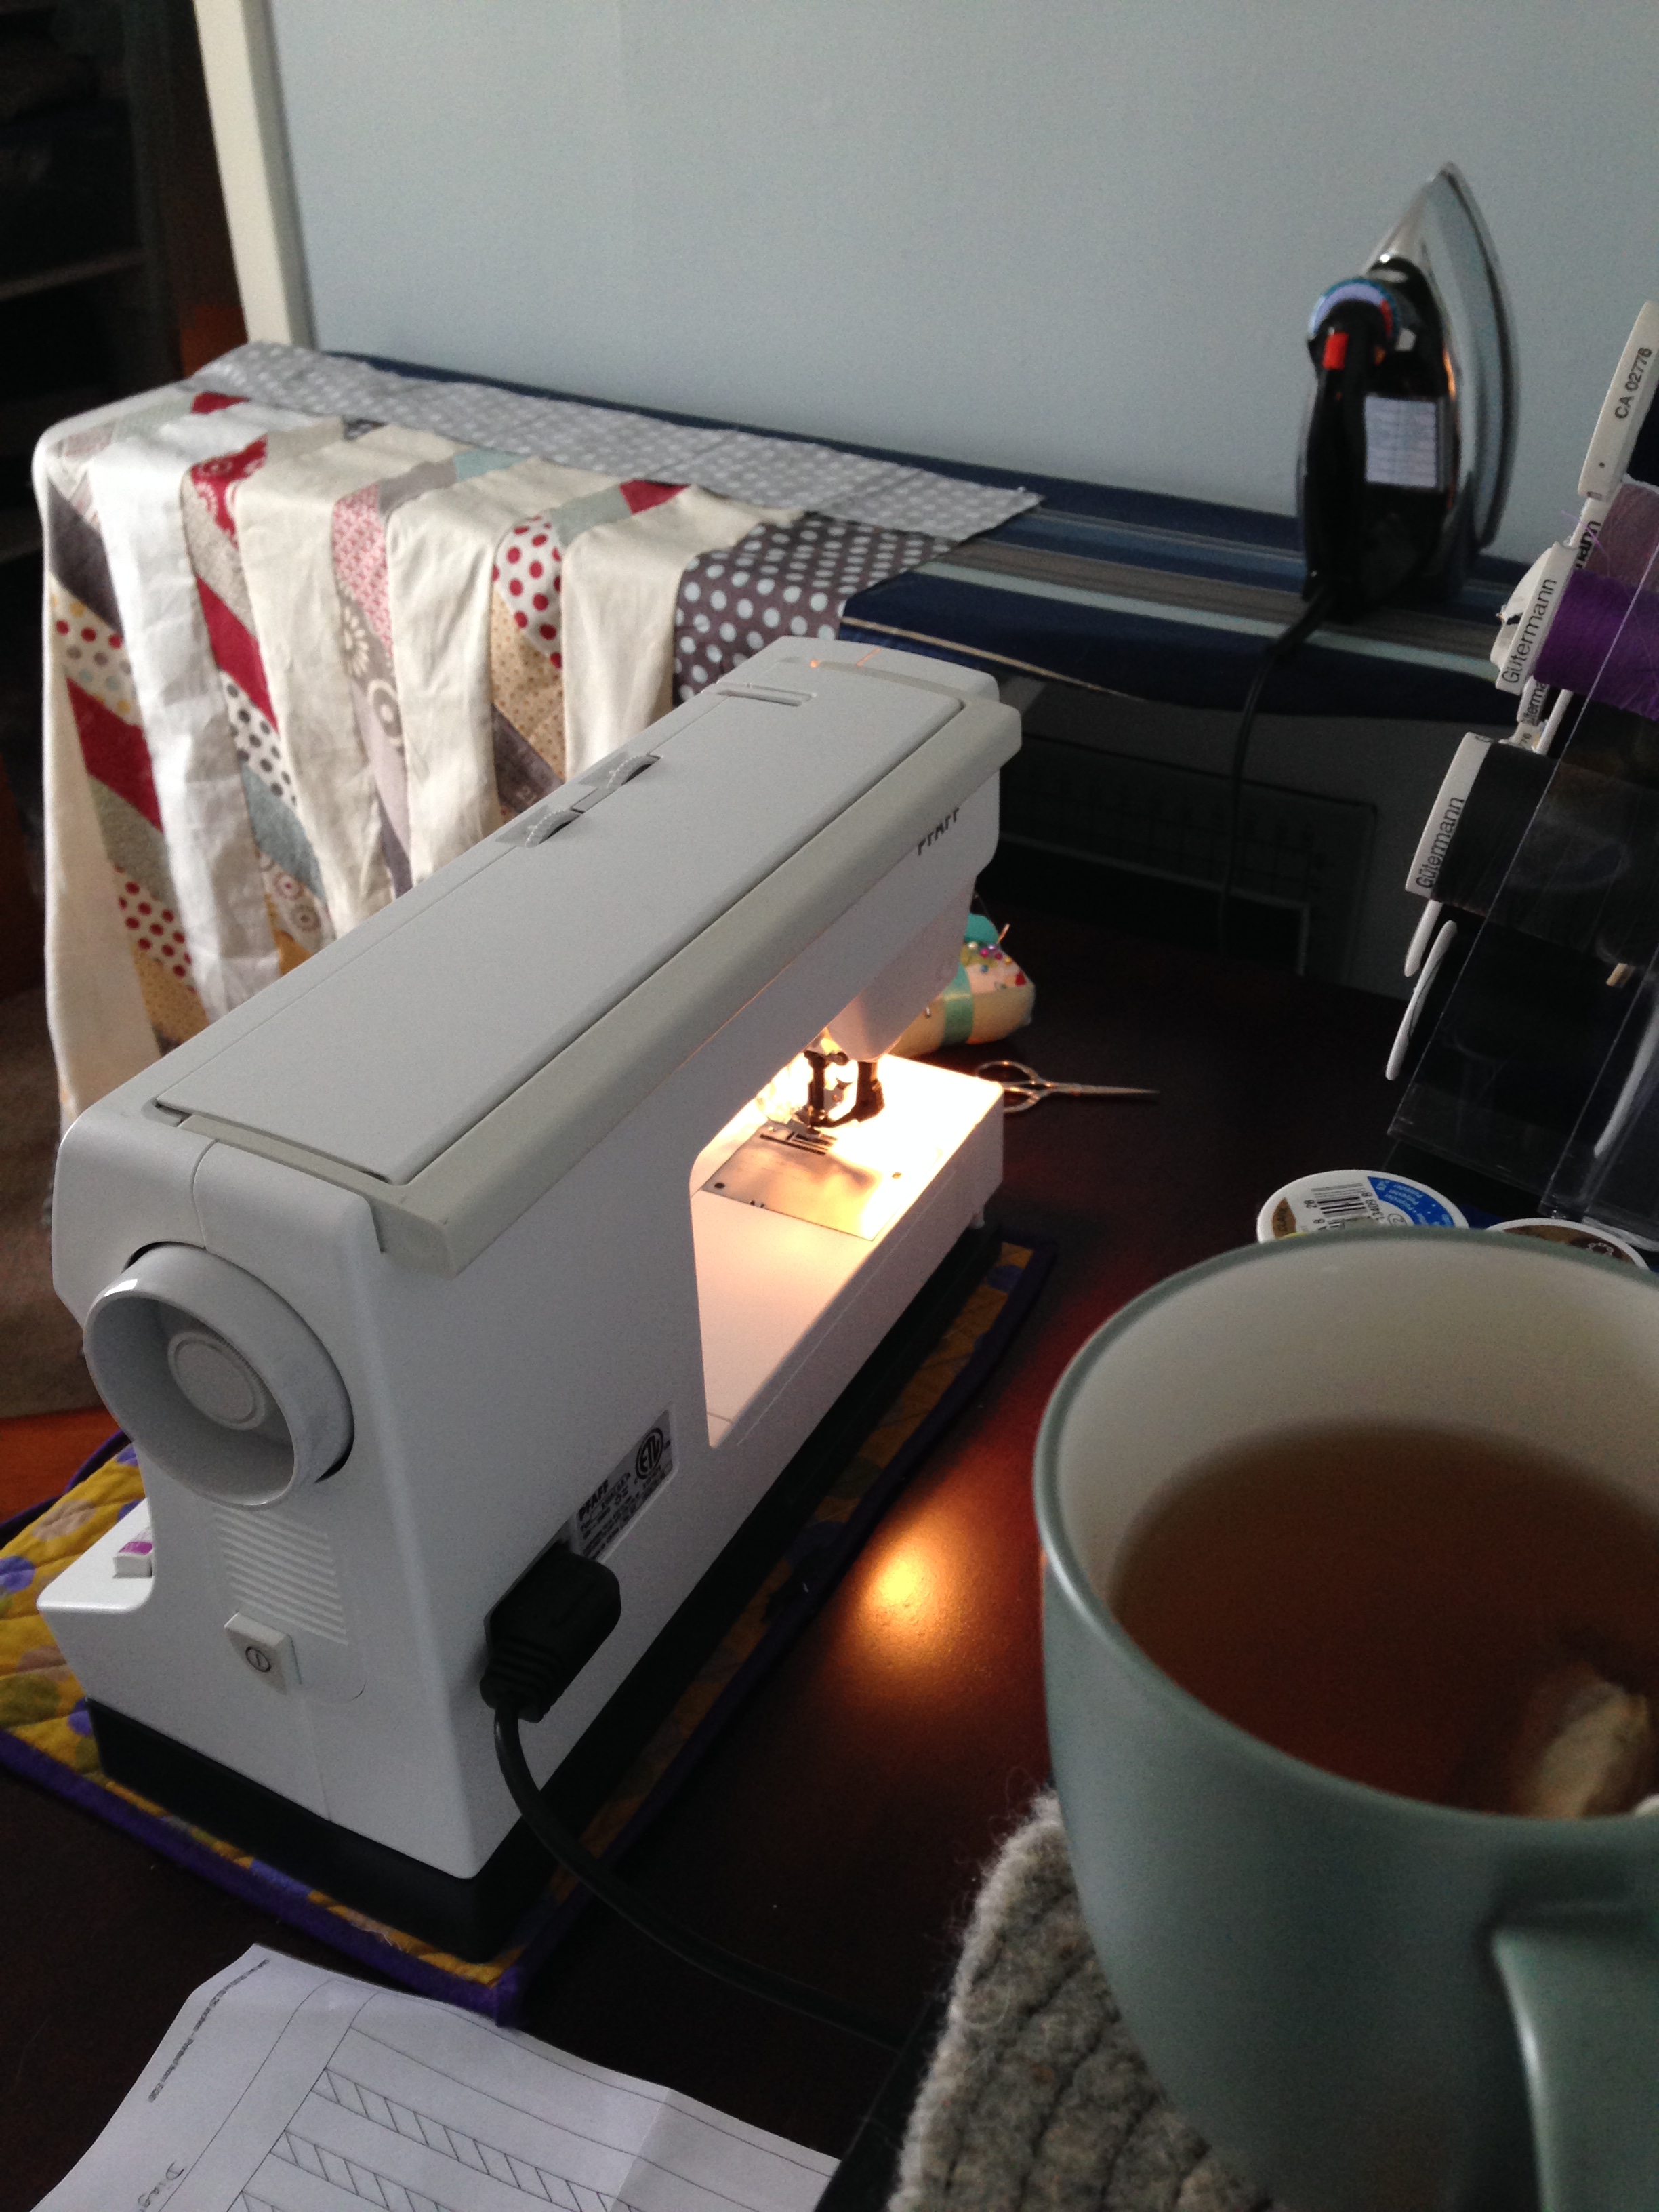
Between the snow and the seemingly never-ending stream of sickness in the Cleaver household, there's been a lot of indoor days. Some with just enough energy to build a fort to "nap" in, others of a more productive sort. 

I finished piecing my quilt top, made my "sandwich" and have begun the actual quilting of my quilt. Huzzah!

I decided to hand-quilt it. I'm enjoying the ever-so handmade nature of my uneven stitches and since there's no deadline to be finished (I started it over 2 years ago after all), there's no need to rush. I haven't done much beyond those few test circles, as my hand-work time (read: evening tv time) has been filled, as it most usually is, with knitting.

I've finished one sample sock for a new pattern (and if you're interested in being a tester, let me know!) and have been working on a number of swatches for all kinds of different designs. I sat yesterday with a stack of stitch dictionaries and post-it notes and came up with at least one idea I really adore for a submission call. I had to tell myself to bind off the swatch because I wanted to keep knitting it.

On days I've been home with LMC, for illness or weekending reasons, she keeps me on my toes- sometimes literally, as she's become very interested in ballet, which to her means yelling BALLET! and doing something akin to an arabesque attitude. I have since taught her to plié as well.

I'm not sure where she picked it up, as the only ballet I can recall showing her prior to this was bits of the nutcracker at Christmas and the occasional SYTYCD clip.But perhaps it stuck as the other day she found and insisted on wearing mommy's "ballet shoes."  Then again it could be something from daycare, as it took me a while to figure out her "ski" impression from school - there's only so much those daily report sheets tell you.

In there anything you've been working on lately?


Print Friendly and PDF Follow
follow us in feedly

Grandma Batt's Cinnamon Rolls

Grandma Batt's Cinnamon Rolls
Grandma Batt's Cinnamon Rolls via Ms. Cleaver

My grandmother, former home-ec. teacher and enthusiastic chef and baker, had file of cabinets of recipes,  cabinets of dishes, and an addition built to house a formal dining room. All of which is to say, Grandma loved to entertain and provide food for those she loved.

It is somewhat strange then, that while I have several family recipes I inherited from my Dad, I have only one directly from my Grandmother.

But if I was only going to have one, I'm glad it's this one. There are a handful of dishes that say "Grandma" to me: jello salad, bananas in milk with sugar, oyster stuffing, and these cinnamon rolls.

She would make them in huge batches and freeze them uncooked, then pull them out for company. They were always amazing in my book, so it was the one recipe I requested. The result: a hand-typed recipe card, with a few typos here and there, is a especially precious bit of my baking book.

But for all that, I made the recipe for only the second time this weekend, and I more fully understand the large batch/freezing practice, because with a yeast dough base they literally took all day to complete. Most of it was rising time and very little was hands-on time, but still - not something I'm going to bang out every weekend.

That said, if you have the time, these are well worth the effort for a special meal and way better than those things in a can.

Grandma Batt's Cinnamon Rolls

makes 18 rolls

Sweet Roll Dough

  • 1 pkg active dry yeast
  • 1/4 cup warm (not hot) water
  • 3/4 cup lukewarm milk
  • 1/4 cup sugar
  • 1 tsp. salt
  • 1 egg
  • 1/4 cup shortening or (softened unsalted butter)
  • 3 1/2 to 3 3/4 cups flour

Cinnamon Filling

  • 2 Tablespoons melted butter
  • 1/2 cup sugar
  • 2 tsp. cinnamon

Quick White Icing

  • 1 cup confectioner's/powdered sugar
  • 2 Tablespoons milk
  • Few drops of vanilla extract (optional)

In a bowl, dissolve yeast in water. Add milk, sugar, salt, egg, shortening and half of flour to the yeast. MIx with spoon until smooth. Add enough remaining flour to handle easily.

Turn onto lightly floured board; knead until smooth (5 min.). Round up in greased bowl, bring greased side up. Cover with cloth. Let rise in warm place (85 degrees F) until double, about 1 1/2 hours. PUnch down; let rise again until almost double, about 30 min. Shape.

Roll dough into oblong, 15" x 9". Spread with a the Cinnamon Filling mixture. Roll up tightly, beginning at wide side. Seal well by pinches edges of roll together. Even up roll by stretching slightly. Cut roll into 1" slices. Place in greased 13"x 9" pan or 18 greased muffin cups. Cover and let rise until double, 30 to 40 minutes.

Bake 25 to 30 minutes in 375 degree F oven. Frost while warm with Quick White Icing as desired.

To make icing, shift powdered sugar into bowl...moisten with cream or milk to spreading consistency. Add flavoring.


Print Friendly and PDF Follow
follow us in feedly

Design Diary: Lady Heartrose - Sketching

Lady Heartrose Sketch

Just in time for Valentine's, a design with a little love - Lady Heartrose and my first post chronicling my process of pulling together a new knit design.

Oftentimes I swatch first, sometimes I sketch first, but usually by the time I get around to sketching a design, I already have a pretty good idea of what I'm going to do, so I don't tend to make more than a few versions, mostly to tweak things like necklines. 

This one, being based, on the child's cardigan was even easier. The questions are pretty basic - aline like the original, or fitted?  A-line. What kind of sleeve? Something a little fuller and 3/4 length, because I think it's the most flattering/wearable. Still raglan, still crew-neck.

I usually use this "plus-size" croquis for most of my sketches, though sometimes I'll trace over a  photo of a celebrity or blogger if they provided some kind of inspiration or if I have a certain type of "ideal wearer" in mind. .  Here I just wanted something simple, sweet and lady-like. So she got a bob and a pencil skirt. She's probably looking over at a cup of tea and a slice of sweet quickbread or cake. 

Next up: Swatching!!


Print Friendly and PDF Follow
follow us in feedly

5th Annual National Pie Day Pie-Luck & Blackberry Pie with Lemon Streusel

Blackberry Pie with Lemon Streusel
Serving Up Pie
Sweet Pie Sampler
Valentine's Day Cherry Pie
On the needles
Roses and Snow
HandKnitSockLove
Blackberry Pie with Lemon Streusel

For the fifth year in a row, my knitting friend and I gathered at Casa Cleaver to celebrate National Pie Day with lots and lots of pie.

Due to the seemingly never-ending snow and some scheduling conflicts, our group was slightly smaller than usual, but we still managed to have 11 kinds of pie represented. There was a spicy meat pie, lentil shepherds pie, empanadas, cauliflower quiche, chocolate tart with hazelnut crust, nutella/banana, raspberry ribbon, ginger pear, lemon meringue, cherry and blackberry.

Much pie was eaten, much tea was drank, and much knitting was done. We also managed to cover all 70 toes present with hand-knit socks.

I intended to make my traditional cherry cup-pies, but due the lack of tasty ingredients in unbaked pie-dough, my baking assistant started losing interest and I went for simple(r), by making a regular pie and using a heart cookie cutter for the top crust, which would make a great valentine's day dessert, methinks.

I also tried out a new recipe that I've been dreaming of for a while, inspired by my much-beloved Katie Cakes from Chicago. While I'd like to try one at least one more iteration before I'd call it final (adding a bit of cinnamon and clove to berries), it was pretty delicious, so I thought I'd share it here.

Blackberry Pie with Lemon Streusel:

Crust

  • 2 cups flour
  • 1 teaspoon salt
  • 2/3 cup shortening or unsalted butter
  • up to 1/2 cup of cold water

Filling

  • 4 cups blackberries (boysenberries would work great too), fresh or thawed frozen berries
  • 3/4 cup sugar
  • 3 Tablespoons cornstarch

Streusel

  • 1/2 cup flour
  • 1/3 cup granulated sugar
  • 1/2 stick melted butter
  • zest of one lemon

Pre-heat Oven to 350 Degrees F.

Mix together flour and salt for crust. Using knives or a pastry cutter, cut in shortening until mixture resembles course meal. Add cold water a small amount at a time, until dough holds together. Separate into two equal-sized balls. Flatten balls into discs and wrap separately in plastic wrap and place in fridge for about 30 minutes, or at a minimum, while filling and streusel is prepared.

Mix together filling ingredidents and set aside.

Mix together streusel ingredients in a small bowl and set aside.

Roll out chilled dough for bottom of pan. Insert pie filling. Roll out dough for top of pan, making a lattice structure is recommended.

Sprinkle streusel on top. It seems like a lot of streusel, but I'd recommend using it all as the pie expands slightly while baking.

Put in oven and bake for 1 hour, or until pie bubbles. Briefly broil top to brown if needed.


Print Friendly and PDF Follow
follow us in feedly

Works in Progress

Sock in Progress
Good Night Sleep Tight in Progress
Good Night Sleep Tight Sketch
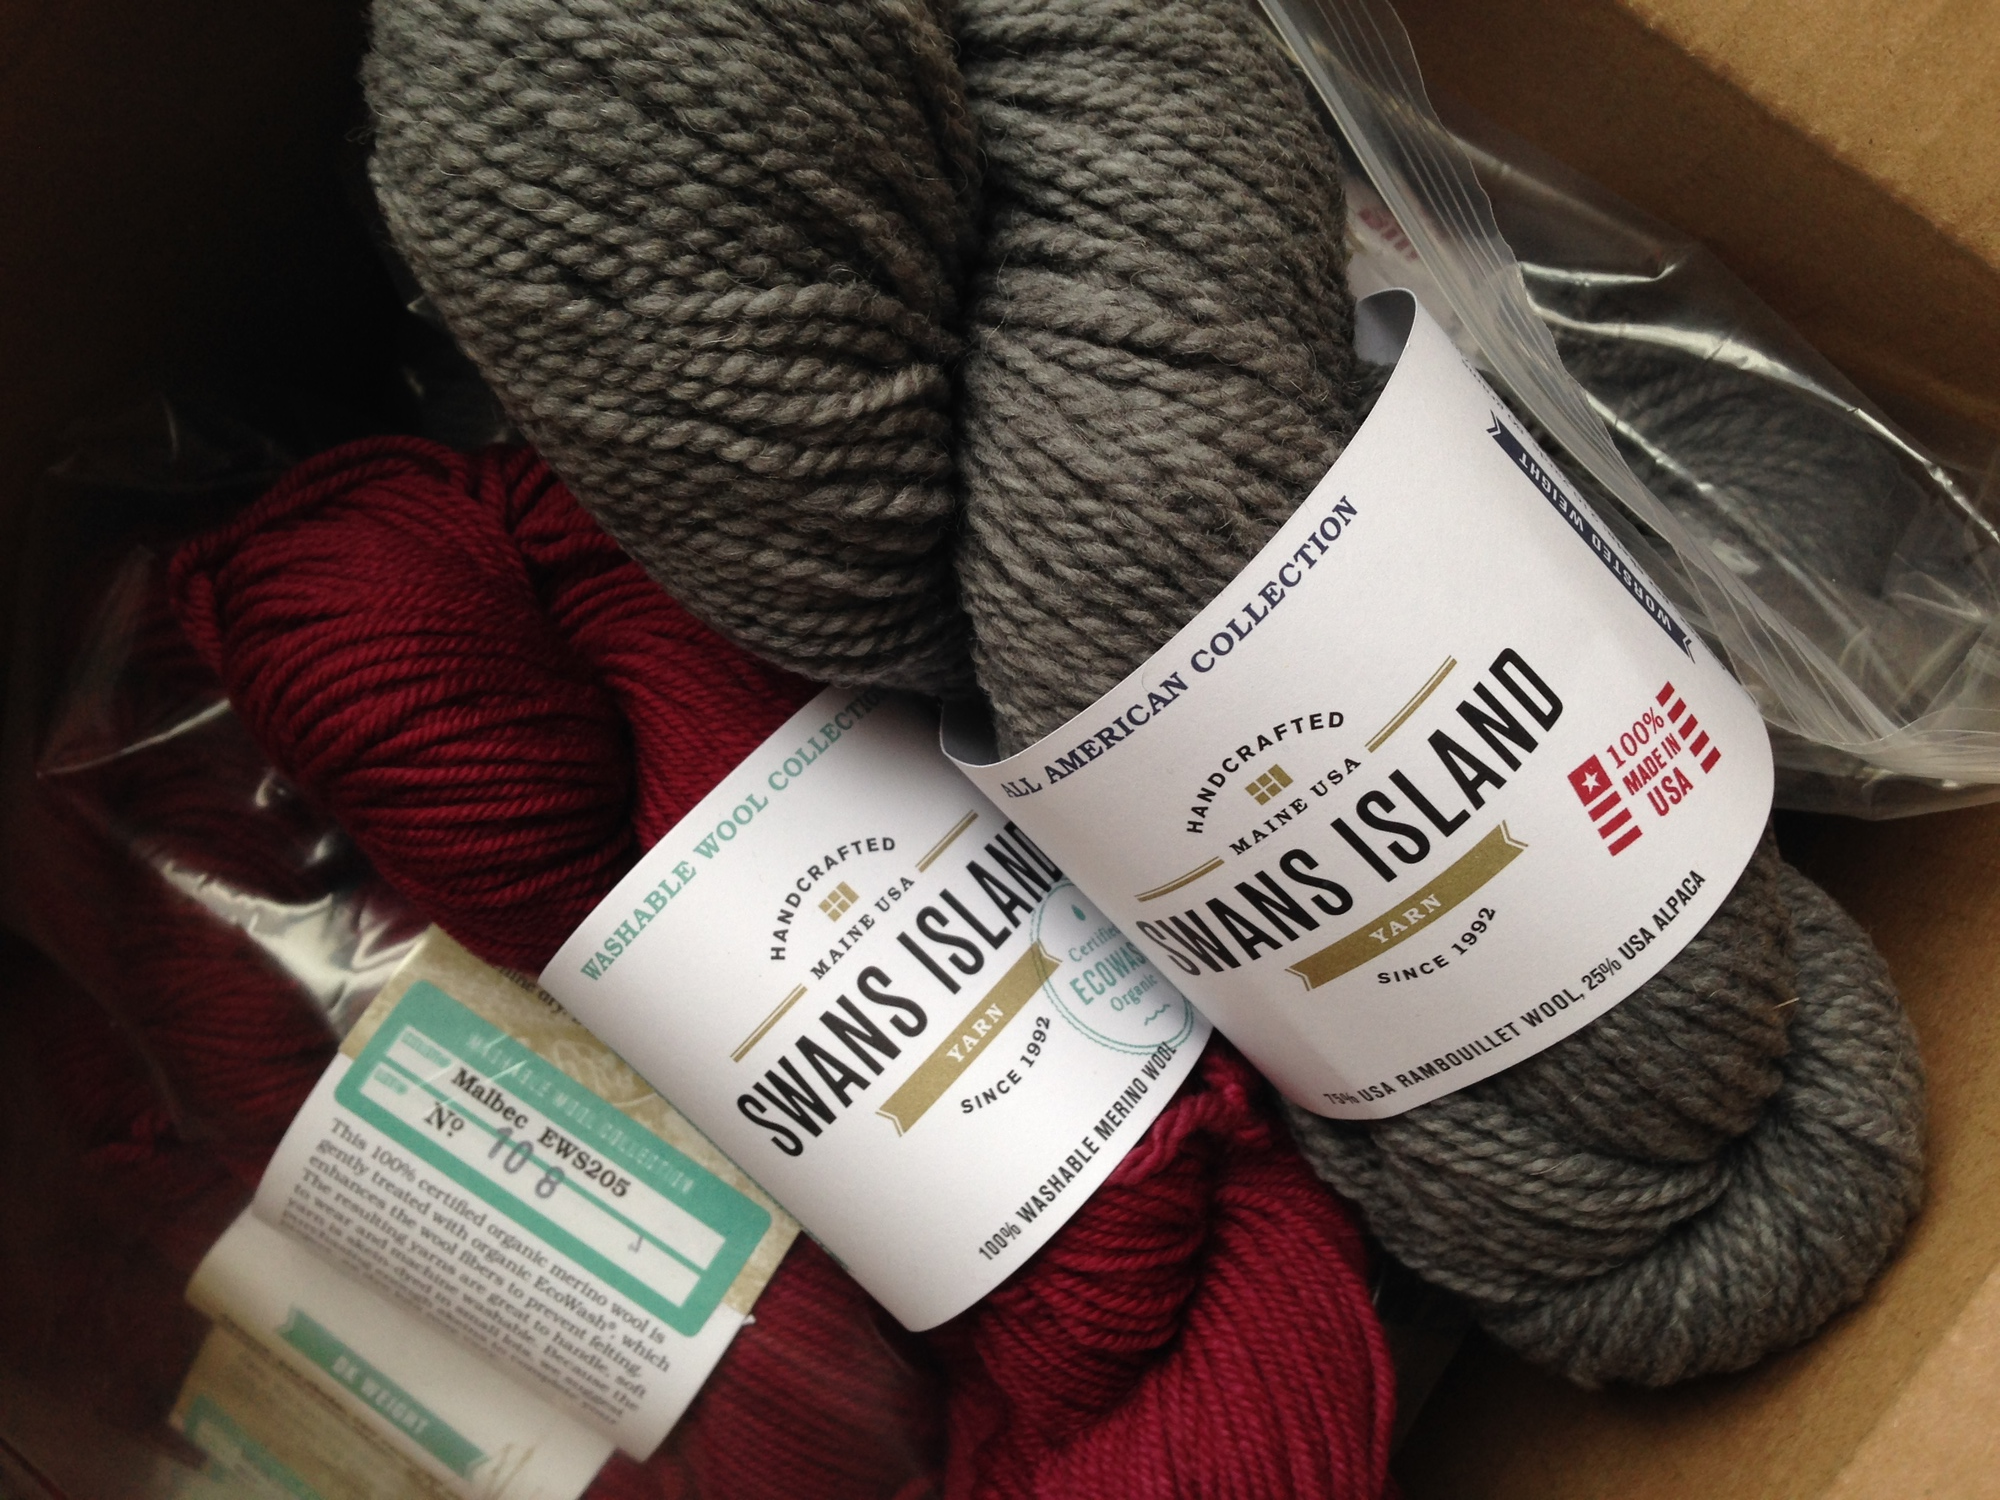
Box of Swans Island Yarn

Nature, and my hands apparently, abhor a vacuum. 

I know I said I was in-between projects, but now it seems like I have so many ideas that I don't know what to do with myself. 

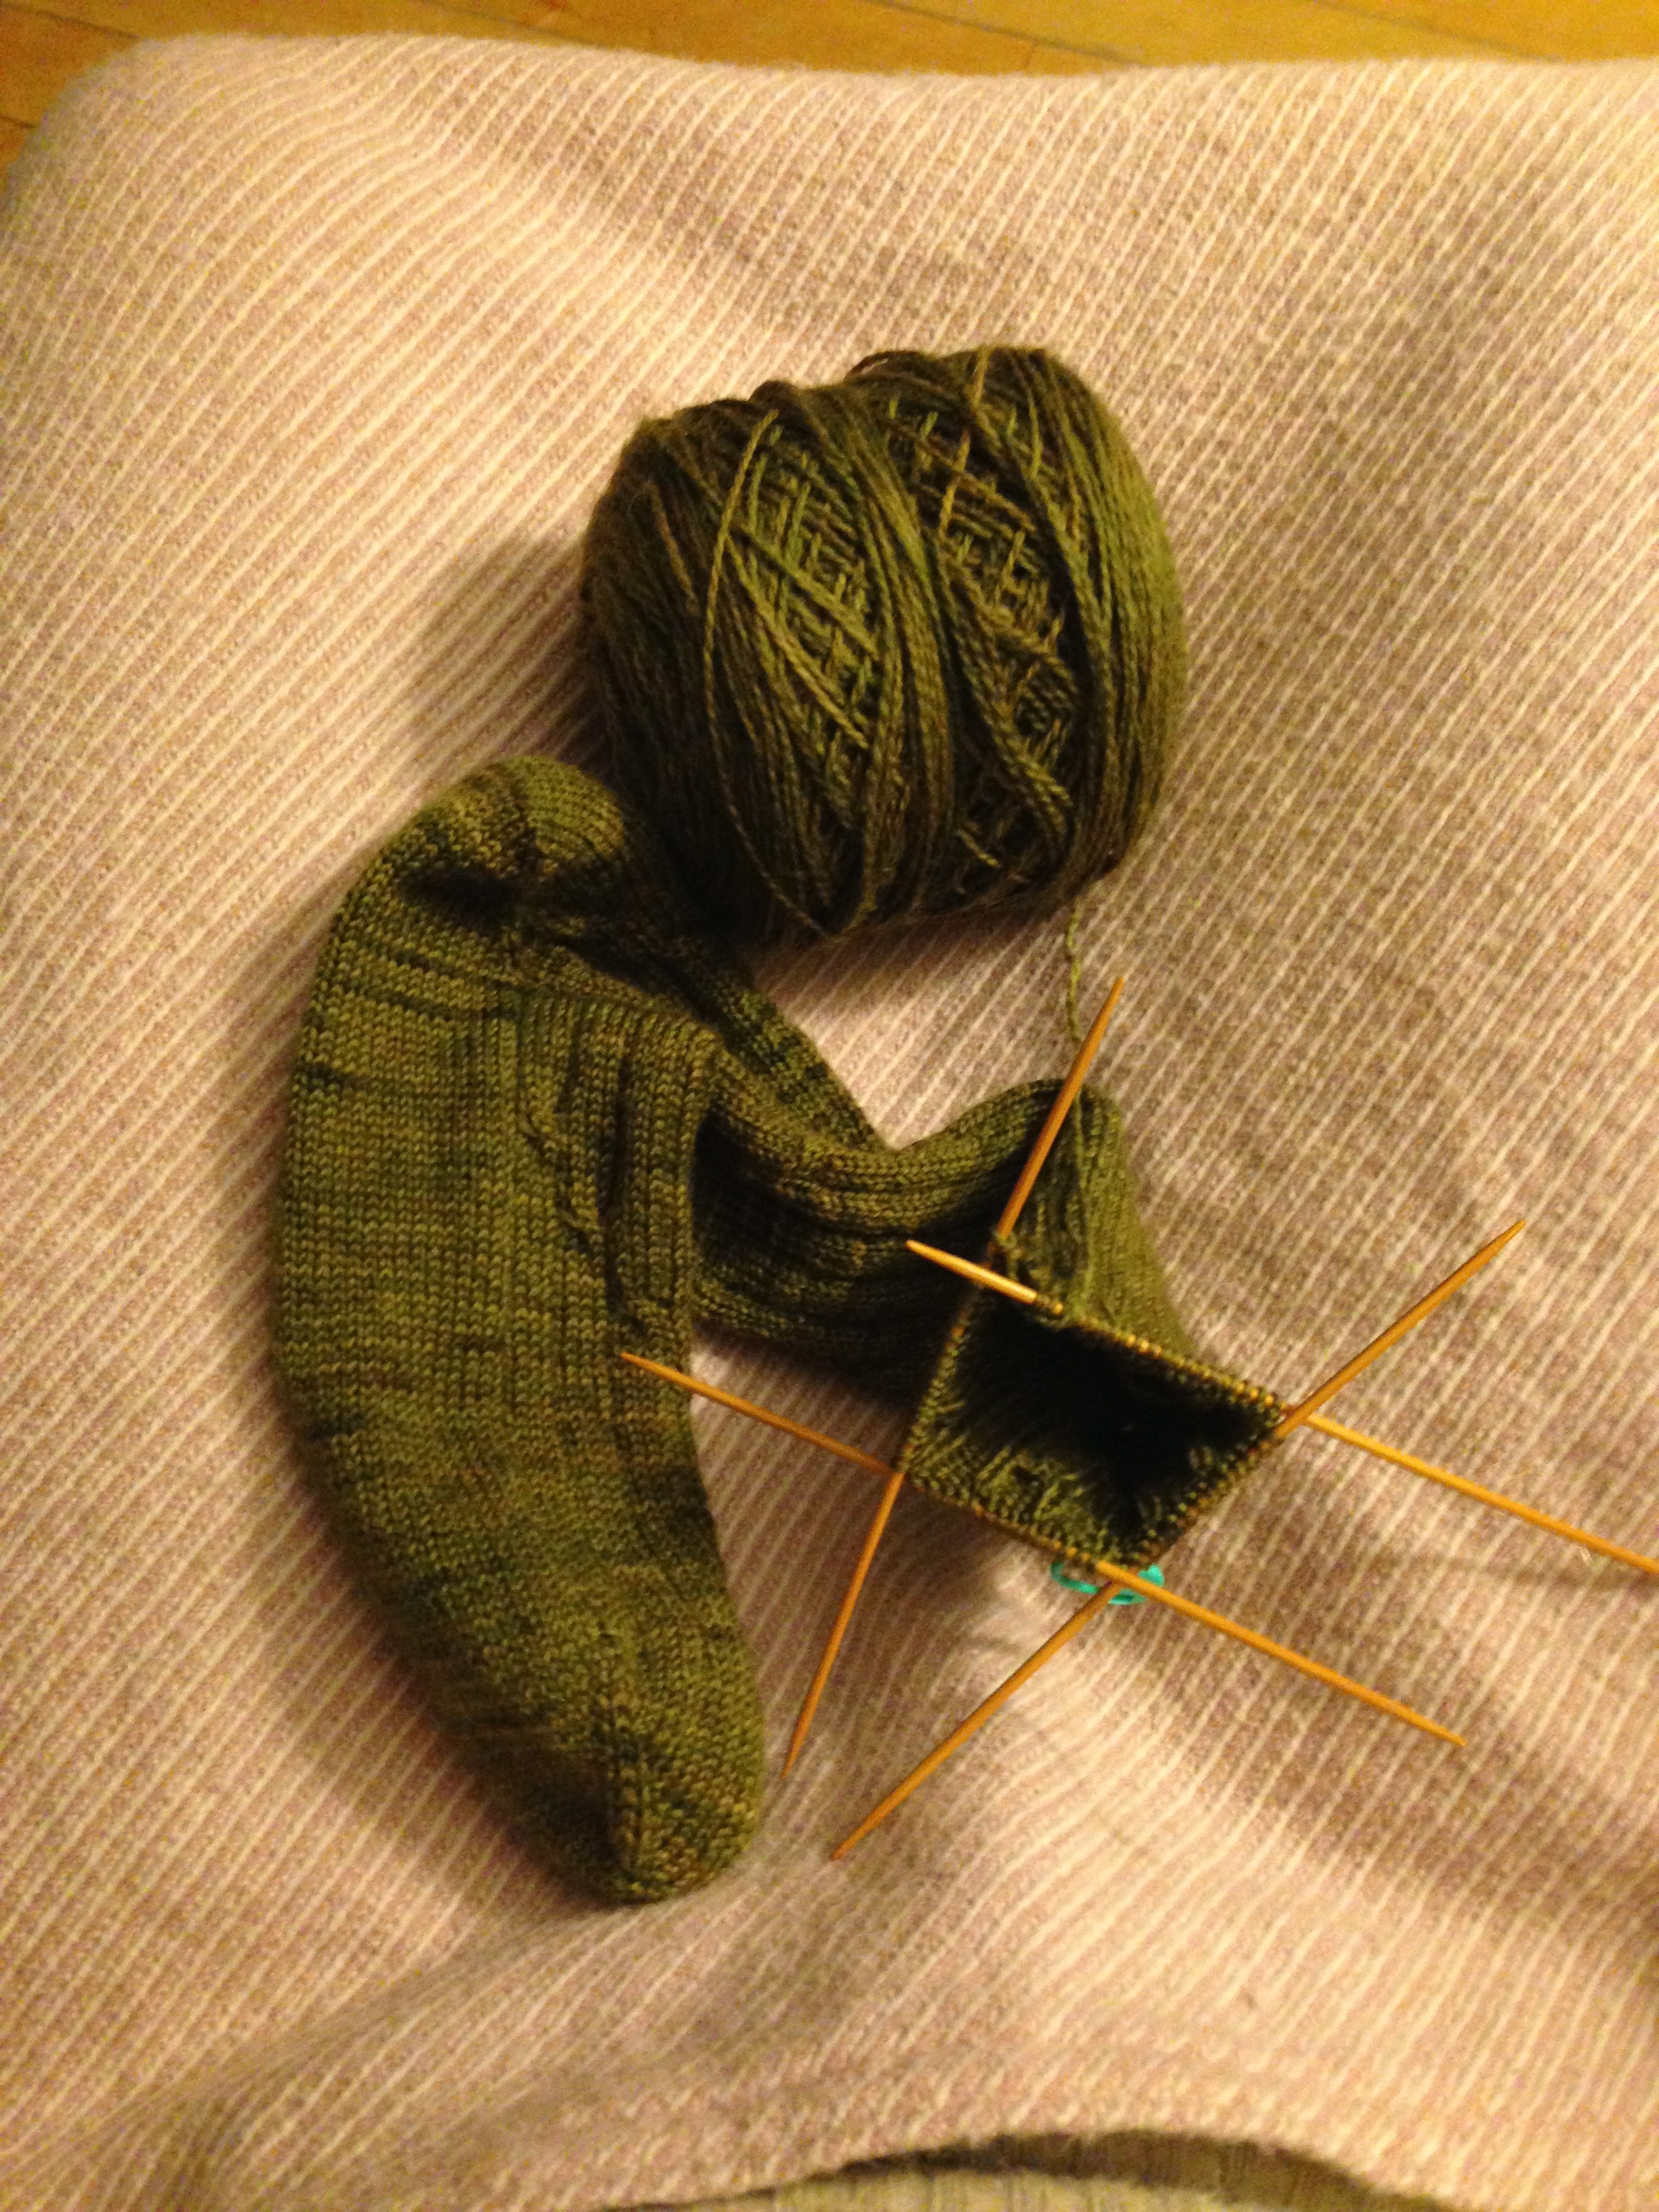
I picked up a half-finished pair of socks from over two years ago and am about one episode of Jeopardy! + one episode of Doctor Who  away from finishing that long neglected sock later this evening. And in a fit of productivity, I wrote up a multi-size pattern for it, like you do. Pending some good light for photos and some Adobe time this weekend, we may have an unexpected new pattern out soon! (It looks more interesting on, believe me.)

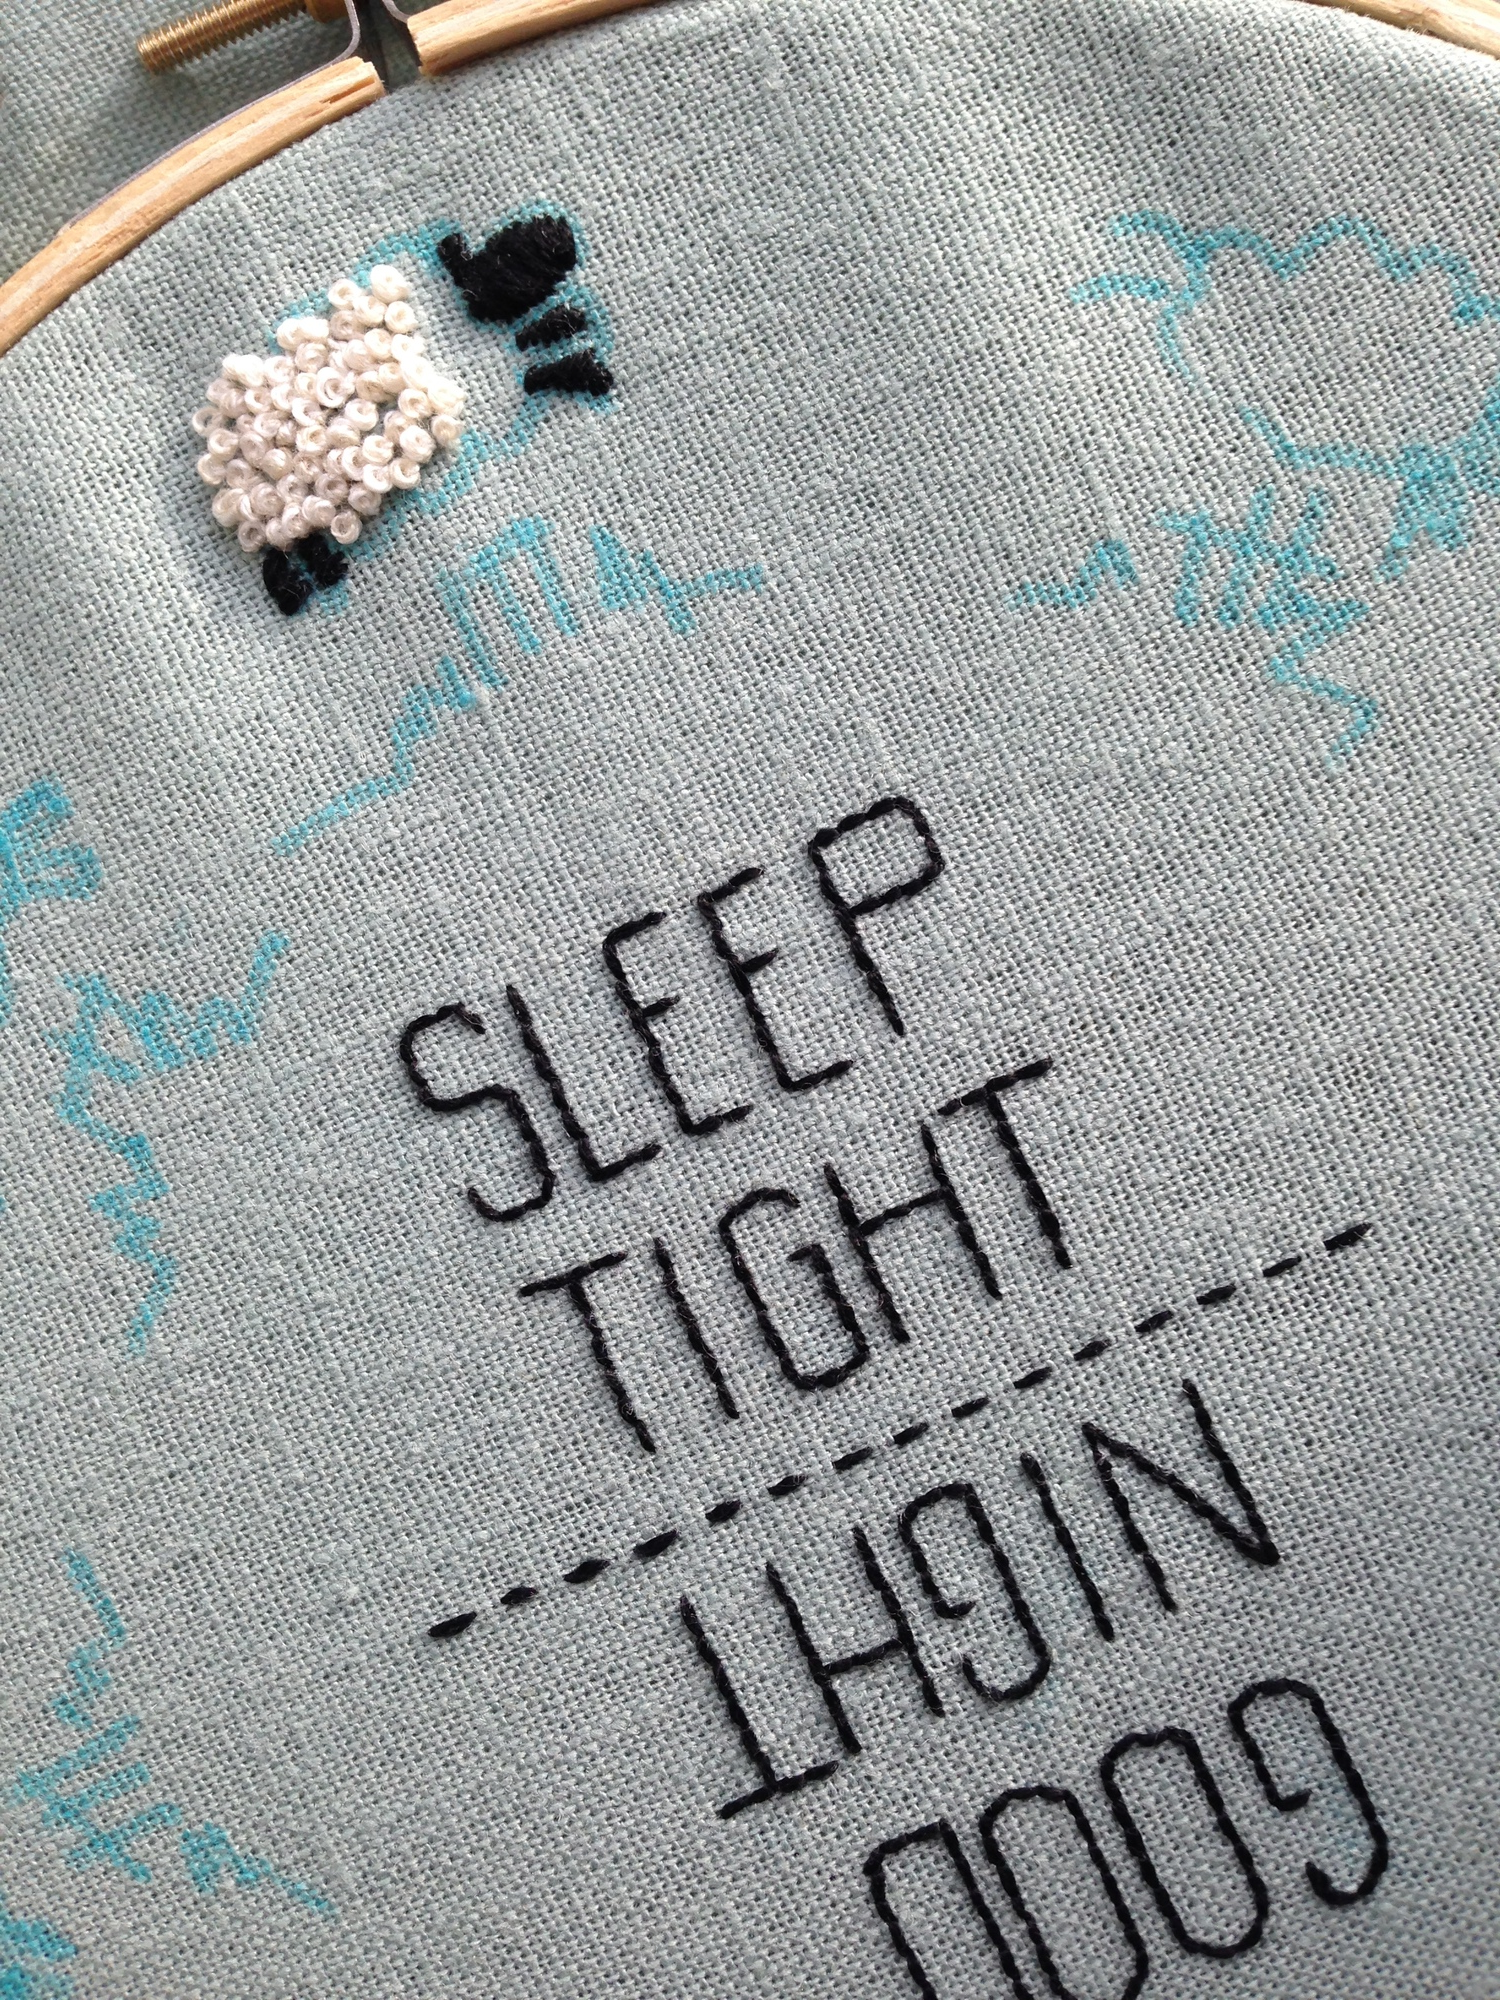
I got my new backing fabric for my embroidery piece and am being perfectionist over the "font" (as much as handwriting translated to stitching can be a font). Being a perfectionist, it's slow going and contemplative, which is how I like my embroidery to be.  

When I picked up my embroidery fabric, I also picked up my backing and batting for my quilt. I still need to attach the border to the top, and sweep the floor before I try basting anything, but I feel like it's coming along nicely. I think I'm going to hand quilt it, in a super simple way. I'm too scared to try out machine quilting just yet. at least, i'd prefer to be some practice in on a pillow top or something first before I dove into a whole quilt. 

Last and not least, my box of yarn arrived from Swans Island this week, which means I can start swatching. I've got plans for two women's sweaters, a spring/summer cardigan and a fall/winter pullover that I can't wait to start working on. And then there's the shawl ideas in my head, and LMC's second birthday is coming up soon and I have  to make something for that, and.. well you get the picture.

What's keeping your hands busy these days?


Print Friendly and PDF Follow
follow us in feedly