Pssst! Check out page 8 of the new Spring/Summer issue of Twist Collective, you might see a name you recognize!
Introducing: SandDune
For a while now, I've been dreaming about starting my own little knitting pattern company, a today that little dream just got a little more real.

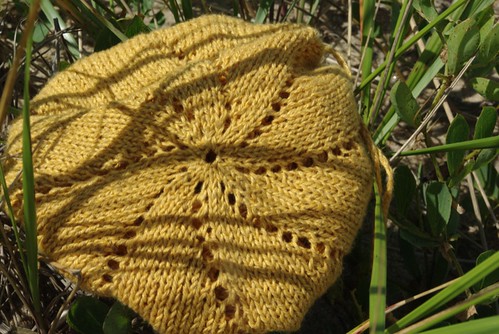
This is SandDune, my first Ms. Cleaver Creation.
Inspired by my favorite Maine beach, SandDune is a lacy self-storing bag, perfect for gathering together your favorite items for those days by the shore that are fast approaching. Though it's cool and rainy in Portland today, I know before too long, it'll be time to head out to the ocean.

Knit from a about 200 yards of Elsebeth Lavold Hempathy in Sunflower #14, the bag is both study and airy. The hemp gives the bag a beautiful earthy look. Knit in the round, the bag is a quick and satisfying knit.

The pattern can be purchased in PDF form for $5.00 USD via my Ravelry store or the store:
I'm very proud of this pattern and am happy to say this is the first of many designs on my pipeline and there'll be more surprises in the weeks and months and years to come!
When Hobbies Collide! - DPN Holder Tutorial
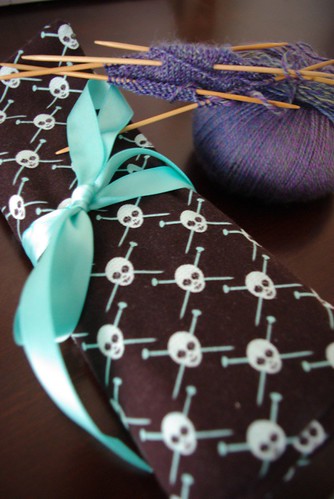
The day before I started my new job, I sat down at the machine and sewed. In preparation for my soon-to-be-condensed crafty scheduled. I designed, cut and sewing this little project in about an hour (research time not included). This is a new land-speed sewing project record for me.
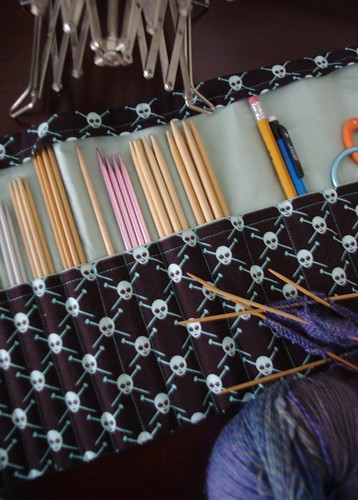
I had picked up a 1/2 yard of this amazing Michael Miller fabric several month ago thinking to make something knitted-related in the future. I wasn't sure what, but with my growing frustration with my growing doubled-pointed needle collection, I knew I had to make a DPN roll.
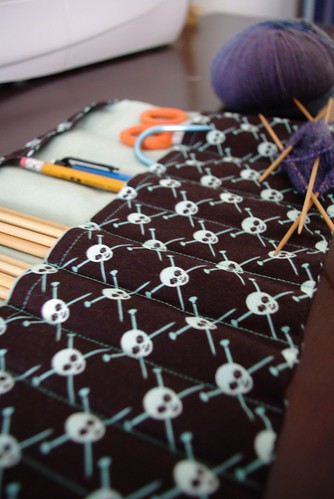
I trolled blogs, etsy, and flickr looking for inspiration and then dumped out all my needles on the bed, pulled out a ruler, made a few guesses and came up with this:
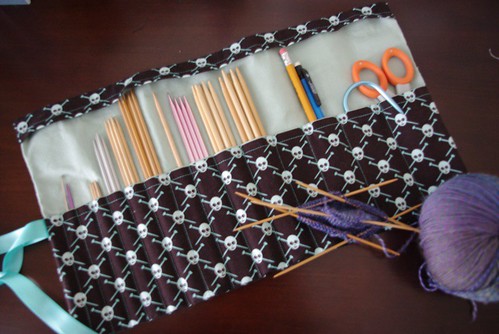
I didn't take pictures while I was making it because it was too dark ad I was speedy along, but here's a somewhat tutorial for the roll.
Materials:
- 1/3 yd main fabric (in this case, the skulls)
- 1/3 yd contrasting fabric
- 1/3 yd fusible interfacing
- 1/3 yd ribbon
- note: I had a 1/2 yd of each and could make two from that amount.
Cut List (all measurements in inches):
Main Fabric
- 1 - 9.5"x16.5" - body
- 1 - 5.5" x 16.5" - pocket
- 1 - 2.5"x 16.5" - upper flap
Contrasting Fabric
- 1 - 9.5"x16.5" - body
- 1 - 5.5" x 16.5" - pocket
- 1 - 2.5"x 16.5" - upper flap
Interfacing
- 1 - 9.5"x16.5" - main body
Directions:
All seam allowances are 1/2". Press after each seam.
- Iron fusible interfacing to the back of the contrasting body piece.
- With right sides facing, sew together top of pocket. Turn piece right side out and top-stitch the edge. Do the same with the upper flap pieces.
- With the right side of contrasting body and the main fabric of the pocket of facing you, baste sides and bottom of pocket unto the contrasting body.
- Stitch divisions into the pocket. Make sure to begin measuring 1/2" away from the fabric edge. The pocket widths from left to right are as follows (there will be 15 pockets total):
- 5/8"
- 5/8"
- 5/8"
- 5/8"
- 3/4"
- 3/4"
- 7/8"
- 7/8"
- 1"
- 1 1/8"
- 1 1/4"
- 1 1/4"
- 1 1/2"
- 1 3/4"
- With the right side of contrasting body and the main fabric of the pocket of facing you, baste sides and top of upper flap unto the contrasting body.
- Fold ribbon in half and pin center of ribbon to the left side of the pocket, alining with the top of the pocket (see photos above). Pin the ribbon unto the pocket so you don't accidentally stitch it down.
- With right sides facings, sew the main body piece and the contrasting body piece together, leaving a gap out to turn right side out.
- Turn piece right side out, making the corners nice and sharp and hand stitch the gap closed. Un-pin ribbon and trim length if necessary.
- Fill with needles and enjoy!
(PS - if you have any issues with this tutorial feel free to email me with questions : ms.cleaver(at)gmail.com)
Three Panel Apron: A tutorial
As you may recall I made a promise to a friend/coworker that I'd make me an apron, and that my first attempt didn't work out as well as I'd wished.

Well, week or two ago, I drafted out some more well-thought out plans and came up with this:
And I'm quite pleased with the final results, so I packaged it up and gave it to my coworker - who quite liked it!
I've recently gotten into posting stuff on BurdaStyle (sorta like Ravelry, but for sewers), and someone wanted to know how I made this apron. It's easy enough, so I thought I'd oblige with a simple tutorial. (Note: I only took pictures of the first half of the process so this is largely text-based)
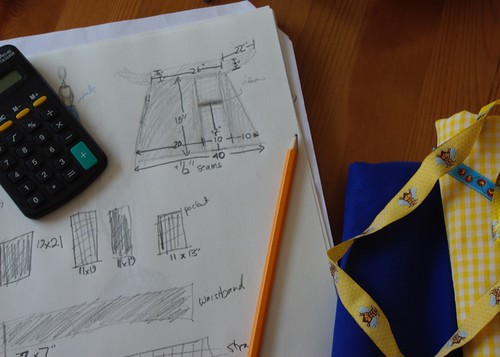
You'll need the following:
Two fabrics, with thread to match each, as well as 10" to 20" of trim (or more depending on how you want to fancy it up).
All seams are ½ inch.
Cut list:
Main Color (in my case, the blue)
- one 21"x19" large front panel
- one 11"x19" small front panel
- one 27"x7" waistband
Contrasting Color (in my case, the yellow)
- one 11"x13" pocket
- one 11"x19" small front panel
- two 23"x4" ties
Press all pieces
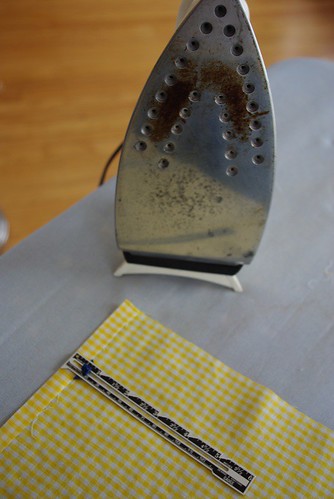
1. With matching thread, make a ½" hem the top of the pocket.
2. Add any trim to front of pocket.
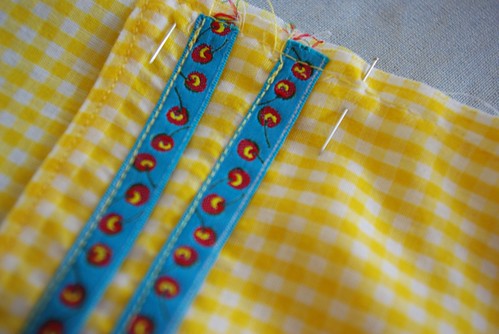
3. Pin pocket to matching apron panel with back of pocket on front of panel and baste pocket on. Press.
4. Prep ties. Hem three sides of each tie, folding over one end to a 45° angle, if preferred - if you do this make sure you make a left and a right facing strap)
5. Baste two lines of stitches inside the seam allowance along the un-hemmed side of each tie. Gather slightly.

6. Change to main color thread.
7. With right sides facing, stitch pocket panel to the right hand side of the large front panel. Press and finish seam.
8. With right sides facing, stitch the smaller main color panel to the other side of the pocket panel. Press and finish seam.

9. Hem the bottom and sides of apron body.
10. Baste two lines of stitches along the top of the apron within the seam allowance, this will be used to gather the top of the apron.
11. Take the waistband piece and fold in half. Press.
12. On the back half and sides of the waistband, press in seam allowance.
13. With right sides facing, place the apron body on the front half of the waist band (if you want a little extra length, you can place it shy of the fold). Adjust gathers so apron fits to waistband.
14. Sew together apron body and waistband front together. Fold waistband over the apron body and press.
15. Slip stitch the back half of the waistband down. Do not sew the sides closed.
16. Insert tie into the opening in the waistband, with the front of the strap facing the same direction as the front of the apron. Adjust gathering to fit. Stitch opening closed, thus attaching the tie. Repeat for other side.
17. Give your apron a final press and you're done! Give to a friend or enjoy for yourself!
Please note that all patterns and tutorials are for personal use only and should not be distributed or produced for sale without the written consent of the author.
My First Sweater: An Adaptation

Last night I finished my first sweater, just in time to show it off at my Tuesday night knitting circle.
It an adaptation of the "Anthropologie-Inspired Capelet" from peonyknits.blogspot.com. The numbers were a significant departure from the original, which was designed for bulky weight yarn, so I thought I'd post the pattern below for anyone interested in doing the pattern in DK-weight yarn. But I take no claim for this awesome pattern. All the glory goes to peonyknits.blogspot.com.

Peony Knit’s “AnthropoIogie Inspired-Capelet” Adapted for two colors and DK weight yarn.
What I Used: Size 5 (24 inch) circular and one set of size 5 double-pointed needles. MC 2 skeins Green Mountain Spinnery “Sylvan Spirit” in Peridot CC 1 skein Green Mountain Spinnery “Sylvan Spirit” in Blue Opal
Sizing: Gauge= 22 st over 4” Note: I made mine to fit a 36-37” bust and 12” arm circumference
What I Did: CO 90 st (Note: If I had to make one change, I would have cast on a few more and had the front pieces be a bit wider) Knit in CC 2 x 2 rib for 2 inches to create neckline
Raglan Increases: (you will need 4 stitch markers to separate the body into 5 sections: left front, left sleeve, back, right sleeve, right front)
MC: Row 1, RS: k3, p11, yo, place marker, p2, yo, p13, yo, place marker, p2, yo, p28, yo, place marker, p2, yo, p13, yo, place marker, p2, yo, p11, k3 Row 2 and all WS rows: knit all stitches Row 3 and all RS rows: k3, *p to next marker, yo, slide marker, p2, yo* repeat from * 3 more times, p until last 3 st, k3 Continue raglan increases until sleeve measures the circumference of your upper arm. End with a WS row.
Split sleeves and body: MC: RS: k3, p to 1st marker, move all st from 1st to 2nd marker onto scrap yarn (right sleeve). P to 3rd marker. Move all st from 3rd to 4th marker onto another piece of scrap yarn (left sleeve). P to last 3 st, k3. WS: Knit all st Continue in reverse stockinette stitch (with k3 at each edge of the row) until desired length, ending with a RS row (I went until I ran out of MC)
CC: Knit 1 row. Switch to 2 x 2 rib, for two inches. BO all st
Sleeves: CC: Pick up all st unto doubled pointed needles, one sleeve at a time, from scrap yarn. Knit 1 row. Switch to 2 x 2 rib, for two inches. BO all st Repeat for second sleeve.
Finishing Weave in all ends. Add a button/pin as desired and enjoy!
Please note that all patterns and tutorials are for personal use only and should not be distributed or produced for sale without the written consent of the author.
Happy Thanksgiving everyone!

Simple Stuffed Animal Knitting Pattern (or One thing leads to another, and another, and another...)

I learned, somewhat begrudgingly, to knit about two years ago. I was interning with a theatre in Maine and by the middle of the Christmas Carol run, all eight of the other interns, including the lone guy, were knitting scarfs and hats like a nuclear winter was on the way.
I was pretty much the lone hold out. My grandmother had taught me to knit a slipper about ten years earlier and I lost interest about halfway through the second one and all my relatives lived in warmer areas of California where they had no need for scarves, so I really didn't have a reason to start knitting, in my opinion at least.
One of my fellow interns, disagreed however, and for our secret santa exchange gave me a learn to knit a teddy bear kit. It started an obsession.

I knitted the kit bear. Then I knitted a large blue bear for Mr. Cleaver. Then I knitted some leg warmers for my dance class and learned to knit in the round. Then I had some grey yarn I had used for the blue bear and my cousin was having a baby, so obviously I knit an elephant.

And then I had leftover pink from the elephant's ears and my best friend was having a baby, so obviously I knit flying pig.

Then I showed by brother (who also knits) this awesome knitted Yoda at boyknitsworld. He wanted to make one, but there's no pattern, so I told him I was pretty good with the stuffed animals and could probably figure it out. I still had a lot of pink yarn left (it was one of those big cheapo polyester skeins - which is why I don't exactly know how much yarn this takes), so I decided to use it to make a prototype, but as a cat for another friend with a baby on the way. Change the colors and the ears, and BAM! - Yoda or Bear or Mouse or Baby or Alien. I was a fool and never wrote down the patterns I made up for the pig or elephant, but I did write down this one.
Stuffed Creature Pattern: Size 7 straight needles Stuffing Tapestry Needle Yarn - 1 skein? A small amount of contrasting yarn for face and accessories.
BODY (Make 2) Right Leg: Cast on 8 stitches. Knit 20 rows. Cut yarn and leave leg on needle.
Left Leg: Cast 8 stitches on the needle with the right leg on it. Knit 20 rows. Both legs should be on the same needle.


Shaping the Body:
Bind off 1 stitch and knit across row. Repeat 8 times until 16 stitches remain.
Bind off 4 stitches and knit across row. Repeat 2 times until 8 stitches remain.
Knit 1 row for the neck.
Shaping the Head: Make 4 as before, Knit 8, Make 4. Knit 1 row. Make 1, Knit across, Make 1. Repeat 6 times until there are 28 stitches. Knit 20 rows. Bind off 1, Knit across, Bind off 1. repeat 8 times until 16 stitches remain. Bind off.
Sew two halves of body together, using a whip stitch, leaving an opening for the stuffing. Stuff to desired cuddliness (I like to give them a potbelly!) and sew closed the opening.
ARMS (Make 2) Cast on 20. Knit 20 rows. Bind off.
Fold each arm in half and sew bottom and side together to form a tube. Stuff and sew unto body at appropriate location.

EARS/TAIL/ETC.
Knit ears and tail to reflect whatever creature you desire. Sew on face, whiskers, freckles, whatever. Make accessories as desired. This thingy is infinitely adaptable and adorable.
Please note that all patterns and tutorials are for personal use only and should not be distributed or produced for sale without the written consent of the author.


