Because I can't do anything the easy way

When I got the the summer dress code at my current job last I could have sworn it was written in 1962.  Along with khakis and polo shirts, acceptable "business casual" wear includes: jumpers and culottes. Jumpers and culottes!

When was the last time anybody wore culottes, or even knew what they were? Now granted my portion of the office is generally casual-casual, because I have no air conditioning and Chicago gets rather hot and humid this time or year, so really I can wear pretty much anything within reason. 

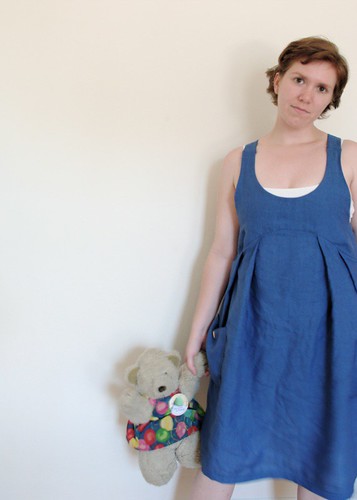
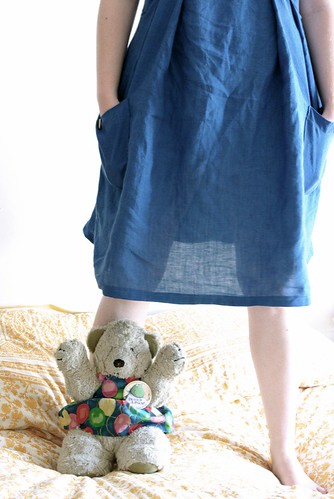
But for those days when I feel like following the code, I could always pull out this jumper I made a few weeks back.

IMGP0852.JPG

Jumpers always make me feel a little like I'm five. Hence the theme of this particular bunch of photos.  Also, I'm running out of things to do in front of a blank white wall, so I'm up for any suggestions.

90-95-100 Ready or Not Here I Come!

This particular project had been sitting on a back burner for about 3 months, largely because I planned to make it out of this beautiful blue linen and I was afraid to cut into it. More to the point though, I wanted to change up the top a bit, and had little-to-no experience with pattern alteration.

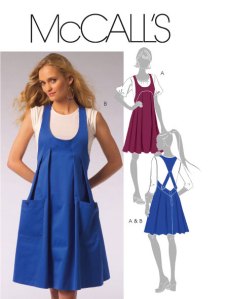
The original pattern (McCalls 5577) looked like this:

Yes, I copied the color exactly. Not so creative I know. I loved the skirt of the thing, but the top seemed a little low, even if I was going to wear a shirt under it, and I didn't quite get the v-shaped piece on the upper back. So I pulled out my ruler from my college scenic design class and wrapping paper and started drawing. I added about 2 inches (plus seam allowance) to the top lines of the top piece blending it in with the existing straps and leaving the bottom bit the same so it'd line up as per the original. Then I transferred it to muslin and sewed the top up.

I quickly discovered that I'd need some darts, which I also had no clue how to do and didn't look up how to do until my next project. So I guessed and basted and ripped and guessed and basted until I came up with something that seemed to work. Of course, without the skirt bit attached I wasn't sure how it would all hang, and sure enough when I made the actual jumper I totally had to move the darts and I'm still not sure they're in the right place, but ah well it works.

IMGP0861.JPG

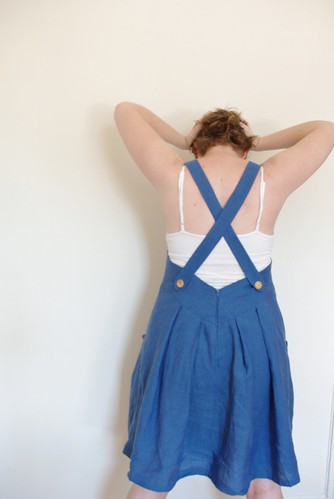
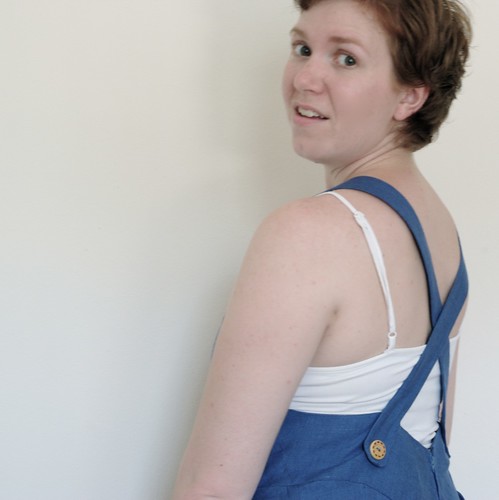
For the back straps, I took the existing lower straps and lengthened them to about 23". Because of where they fell on the back of the jumper, I eschewed buttonholes and tacked the straps straight unto the dress, as well as securing them to the top of the back of the jumper. 

IMGP0880.JPG

All in all, it came out fairly well, though definitely not perfect. But to those seeking perfection, I say this:

IMGP0872.JPG

Print Friendly and PDF Follow
follow us in feedly

Crazy Week

Usually I try to post on Tuesday, but I'm a tad late this week and I'm not even going to cover a project I finished last week yet. It's been a crazy week:

----

Monday: We turned in our non-renewal of lease to our landlords, so there's no turning back on the move now (not that I'd want to).

Tuesday: I started cutting out a dress that I needed to finish by today (Sunday) to enter in a competition.

Anda collar

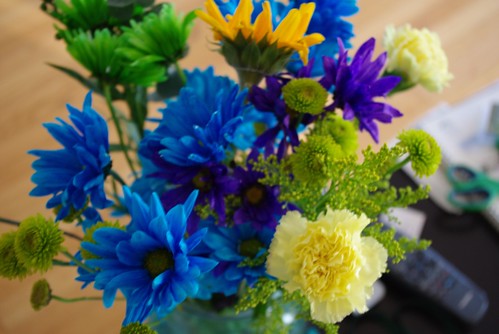
Wednesday: My 25th birthday was filled with beautiful flowers, food, cards, facebook messages and phone calls. Not to mention the cake Mr. Cleaver lovingly made from scratch.

Thursday: Stretched by birthday into a two-day affair with cake for breakfast, donuts with my co-workers and lunch with a friend. Picked up a copy of Alice in Wonderland at the Newberry Library book sale, and Vol II. of a beautifully bound book called Wide Wide World. Did a happy dance at the results of So You Think You Can Dance.

Anda Back

Friday: Spent the afternoon at the American Cheese Society's award ceremony, but sadly, had no cheese. Did some sewing. Watched Road to Perdition (it's really good - and it has Paul Newman, not to mention wonderful cinematography). Ate cake.

Anda Embroidery

Saturday: Had some cake. Sewed a lot. Knitted a tad. Went to two different moving-away parties. Loathed the CTA with the fire of a thousand suns.

Sunday: Sewed some more. Embroidered the dress. Took some pictures. Uploaded them to Burdastyle and hoped I get some votes. Wore my new dress for a walk around Andersonville. Ate the last of the cake.

Anda Adaptation

Did I mention I like cake?

Print Friendly and PDF Follow
follow us in feedly

Three Panel Apron: A tutorial

As you may recall I made a promise to a friend/coworker that I'd make me an apron, and that my first attempt didn't work out as well as I'd wished.

Three-Panel Apron

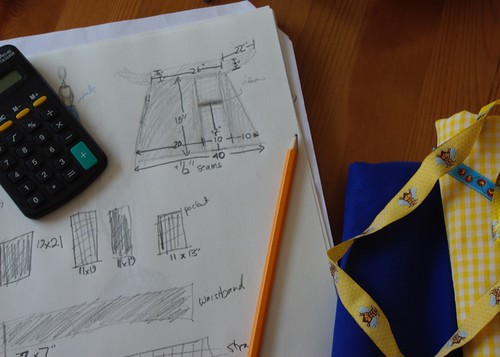
Well, week or two ago, I drafted out some more well-thought out plans and came up with this:

And I'm quite pleased with the final results, so I packaged it up and gave it to my coworker - who quite liked it!

I've recently gotten into posting stuff on BurdaStyle (sorta like Ravelry, but for sewers), and someone wanted to know how I made this apron. It's easy enough, so I thought I'd oblige with a simple tutorial. (Note: I only took pictures of the first half of the process so this is largely text-based)

Planning the Apron

You'll need the following:

Two fabrics, with thread to match each, as well as 10" to 20" of trim (or more depending on how you want to fancy it up).

All seams are ½ inch.

Cut list:

Main Color (in my case, the blue)

  • one 21"x19" large front panel
  • one 11"x19" small front panel
  • one 27"x7"  waistband

Contrasting Color (in my case, the yellow)

  • one 11"x13" pocket
  • one 11"x19" small front panel
  • two 23"x4"  ties

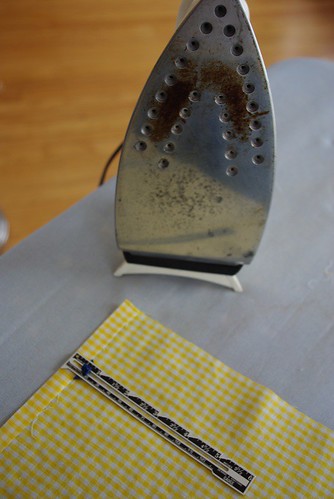
Press all pieces

My Iron Needs Cleaning

1. With matching thread, make a ½" hem the top of the pocket.

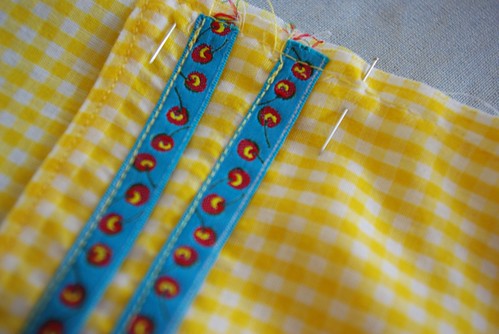
2. Add any trim to front of pocket.

Adding some Trim

3. Pin pocket to matching apron panel with back of pocket on front of panel and baste pocket on. Press.

4. Prep ties. Hem three sides of each tie, folding over one end to a 45° angle, if preferred - if you do this make sure you make a left and a right facing strap)

5. Baste two lines of stitches inside the seam allowance along the un-hemmed side of each tie. Gather slightly.

Back of Apron

 6. Change to main color thread.

 7. With right sides facing, stitch pocket panel to the right hand side of the large front panel. Press and finish seam.

 8.  With right sides facing, stitch the smaller main color panel to the other side of the pocket panel. Press and finish seam.

Pocket close-up

9. Hem the bottom and sides of apron body. 

10. Baste two lines of stitches along the top of the apron within the seam allowance, this will be used to gather the top of the apron.

11. Take the waistband piece and fold in half. Press.

12.  On the back half and sides of the waistband, press in seam allowance.

13. With right sides facing, place the apron body on the front half of the waist band (if you want a little extra length, you can place it shy of the fold). Adjust gathers so apron fits to waistband.

14. Sew together apron body and waistband front together. Fold waistband over the apron body and press. 

15. Slip stitch the back half of the waistband down. Do not sew the sides closed.

16. Insert tie into the opening in the waistband, with the front of the strap facing the same direction as the front of the apron. Adjust gathering to fit. Stitch opening closed, thus attaching the tie. Repeat for other side.

17. Give your apron a final press and you're done! Give to a friend or enjoy for yourself!

Please note that all patterns and tutorials are for personal use only and should not be distributed or produced for sale without the written consent of the author.

Print Friendly and PDF Follow
follow us in feedly

My New Favorite Outfit

I am excited:

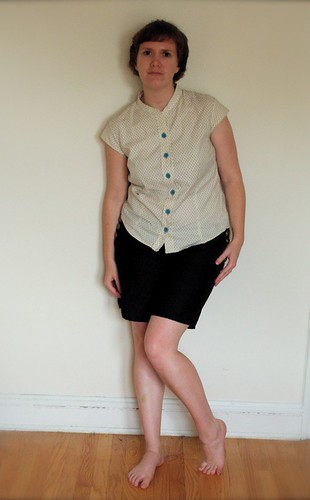
How excited am I about this outfit?

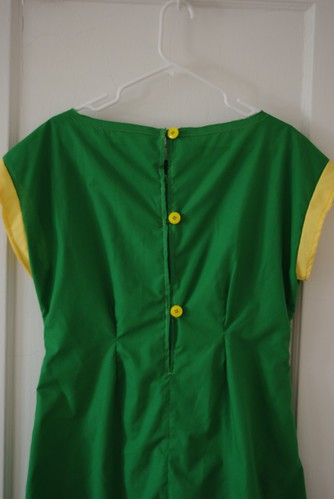
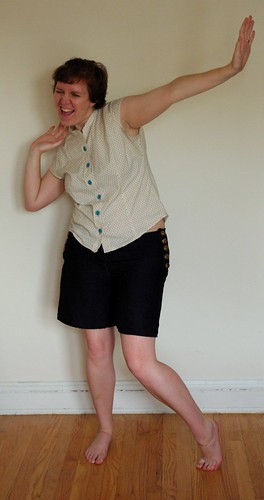
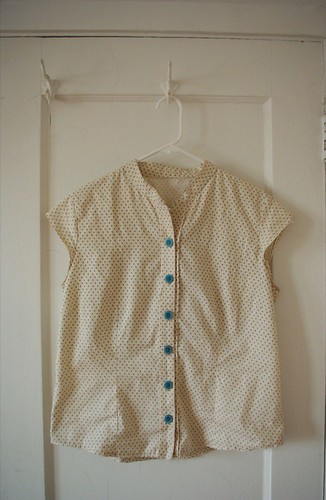
Why am I excited? Because I made this entire outfit myself.

Remember back in the day when I said I have this dream of hand-making my entire wardrobe? Well, I just got one new favorite outfit closer.

Seriously, I love this outfit, like the time between washings is too long and I find myself sneaking the shirt out of the laundry basket in the morning before shamefully slipping it back in, because it does, in fact need to be washed.

I made the shorts right when ye olde camera died a few weeks back, and the shirt shortly following that. 

These are my first pants/shorts I've ever made ever (as in I skipped that whole making a drawstring pajama pants step). The pattern is Ruby from burdastyle. 

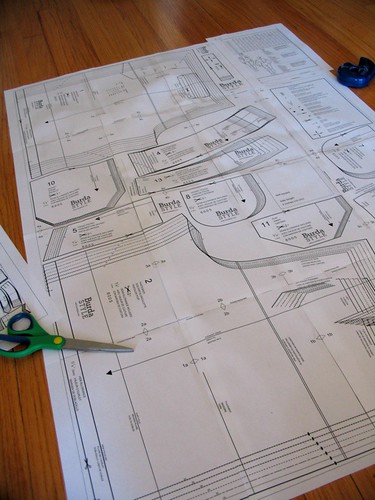
The great thing about the pattern is that is was free, the bad thing was that I had to print out and tape the pattern together.

Pattern all taped together

Also, not always the clearest instructions. I couldn't figure out one part in particular, so my front welt pocket, well, sucks. I kinda knew if would going in and briefly considered leaving it off, but I decided I wanted to challenge myself. 

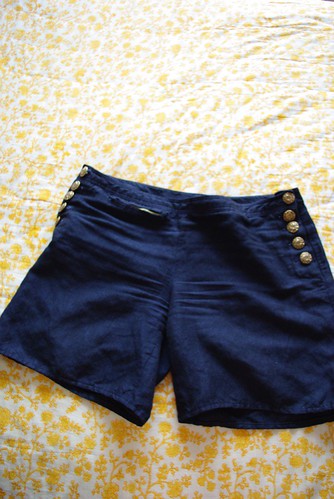
Ruby Shorts

I know they're wrinkly, I took the picture after wearing them. Same with the shirt below.

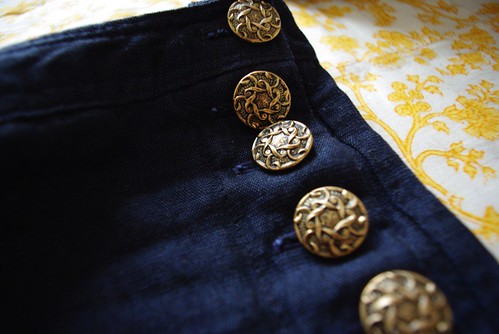
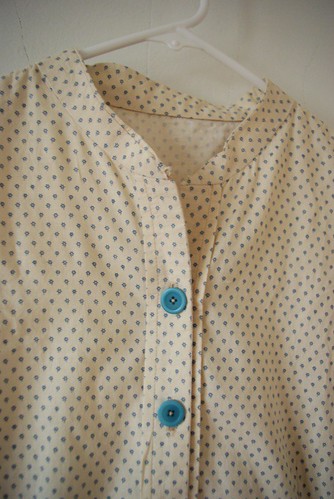
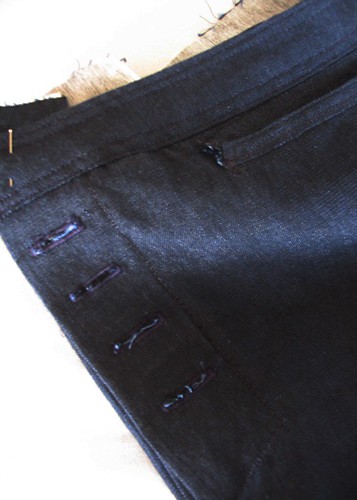
The shorts are pretty basic - a lightweight blue woven material I got one sale, which I really like, but does stretch out after a few wears and needs to go through the dryer to regain its shape. I made the pocket out of some yellow gingham for a bit of fun and as not great-looking as the pocket is, it is a great place to hold my lens cap. My favorite bit though, is the buttons.

Button Button...

I think buttons are such a great way to add flair to something, and I think that without the button on these shorts (not to mention the teal ones on the shorts) I wouldn't like either of these pieces quite as much.

My  New Favorite Shirt

Shirt is pretty basic. The body of the shirt was from the pattern included in Sew U, the sleeves were made following the cap sleeve tutorial (just not gathered) on Wikstenmade. I was a pretty quick sew, though I am still having some trouble with the collar stand/band. If anybody has some hints for that, I'd love to hear em.

Shirt Close Up

So the collars a bit funky, and some of the inside seams didn't finish as nicely as I'd like, but I still really like this shirt and plan to make a number more of them, as soon as I finish some of the other projects I have cut out, and then I'll have a new even favoriter outfit. ;)

Favorite summer outfit

p.s. -later this week, an apron tutorial!

Print Friendly and PDF Follow
follow us in feedly

Can't Say It Wasn't Memorable

Okay, so this weekend was so chock-full of wonderfullness, that I'm going to have to break it down into several posts over the next couple of days. We'll do it chronologically, starting with Thursday.

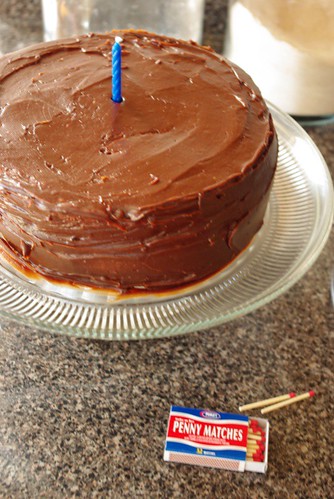
Birthday Cake

July 3 :

Mr. Cleaver's birthday.

The day dawned and I did NOT want to get out of bed, I was so groggy that I was the worst wife ever and forgot to say Happy Birthday to Mr.Cleaver - who after about 10 minutes decided to jog my memory. Oops!That said, as embarrassed as I was, this ended up low on the totem pole of things to go wrong that day.

As I headed off to work, Mr. Cleaver was hunkering down to watch Wimbleton on the laptop, only to discover that our internet wasn't worked, only to call our service provider and discover that the phone wasn't working wither (same company). Mr. Cleaver is probably the first to admit that he's not the world's most techno-savvy guy, and was quickly frustrated, especially when it looked like neither phone nor DSL would be repaired for a few days.

Fortunately, I was able to come home a little early from work, due to a co-worker's going-away party. So I stopped at the grocery store and picked up some ingredients for the birthday cake and the manliest looking flowers I could find for my guy.

Birthday Flowers

Well, the flowers perked him up and so did my present. We also decided to go to our favorite fancy restaurant to dinner, so things were looking up. I started working on the cake, and frosting so it could cool while we were out to eat.

The cake fell a little in the center, but otherwise, seemed to be fine. We walked up the street to the restaurant only to find it boarded up and smelling of smoke. Yes, our favorite restaurant had burned down. At this point, really, we just had to laugh. And eat Chinese, which was nearby and also very good.

When we got home the internet seemed to be momentarily working and we discovered that the restaurant had caught fire in May and didn't look to be re-opening anytime soon.

I set to assembling the cake and it seemed - well -dry. I did a quick check of the reviews on epicurious and discovered I had forgotten to include 1 cup of water.

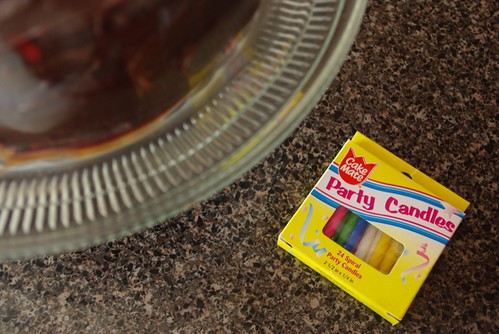
[wp_caption id="" align="aligncenter" width="500" caption="How Many Candles?"]How Many Candles?[/wp_caption]

Well, this was just perfect. Again, we could do nothing but laugh, and despite the dryness, enjoy the cake. I can't say anything about the cake itself, having not made it right, but Mr.Cleaver and I both think the frosting is to die for, so it came out all right. (It also didn't stop us from finishing off the whole thing by the end of the weekend - fresh raspberries help cover a multitude of sins).

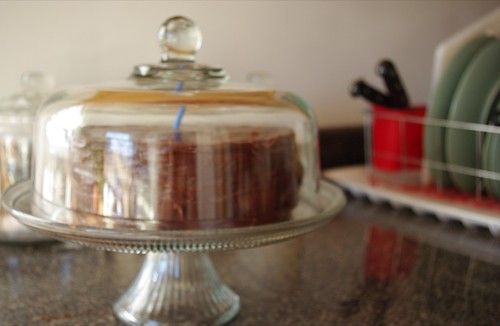
Birthday Cake


In the eveing we headed down to the lakefront to try and see if we could catch any of the City of Chicago fireworks (they always do them on the 3rd, more on that in the next post).

Not exactly what I would have wished for my husband's birthday, but you can't say it wasn't memorable.

My New Go-To Chocolate Frosting from Nana Edie's Devil's Food Cake

  • 1 ½ cups sugar
  • 1 cup heavy cream
  • 4 oz unsweetened chocolate, chopped
  • 1 stick unsalted butter, cut into pieces
  • 1 teaspoon vanilla

Bring sugar and cream to a boil in a heavy saucepan, stirring constantly, and simmer 10 minutes. Remove from heat and add chocolate, butter, and vanilla, stirring until smooth. Transfer to a bowl and cool to room temperature, stirring occasionally. Chill frosting, stirring frequently, until thickened and spreadable.


Print Friendly and PDF Follow
follow us in feedly

I can't post pictures of my own...

So my new camera has arrived, but unfortunately, the memory card was shipped separately, so it is for now unusable and I am at the mercy of the United States Postal Service - hopefully it'll get here by the end of the week and then my blog can have new photos again!

Speaking of photos, I would encourage those of my readers with an interest in photography to sign up for the "Scent of Water" photo-swap. I have participated in the first two rounds and have received lovely photos like this one:

from SleepyNeko for the "Simplicity" swap.

and this one:

from ferry girl for the  "Reflections" swap.

This round's theme is "In Motion," suggested by yours truly! (So I'll have to come up with something good).

To see some more of the talent in these swaps, check out our flickr group, where you can also find instructions for joining the swap - and don't procrastinate - sign-ups close on July 7th!

If you have any questions about the swap or have decided to sign-up, let me know!


Print Friendly and PDF Follow
follow us in feedly

Camera Down!

So I finished both of those projects I teased in my last post and then in the midst of photographing them, the image sensor in my camera died. So it's shipping off to Canon tonight for a possibly free repair and I'll get it back in 7-10 business days after arrival at the Canon repair place. Until then I'm pretty much working camera-less, except for the one on my laptop.

However, the US Goverment did decided to send me a little check, with which I may be purchasing a digital SLR...

Print Friendly and PDF Follow
follow us in feedly

Quick Catch Up

I try to be a good blogger and post at least once a week, twice on a good week - but last week that just didn't happen. 

So here's a quick catch up on what I've been up to since last we met:

  • I've watched two more documentaries on Everest (for a total of three) and am starting my fifth book on the subject.
  • I went to a REM concert at the United Center.

(photo via marcusglimer)

  • I went to the Printer's Row Book Fair and saw a recent library science grad win the Define-A-Thon

(photo via pantagrapher)

  • I went to the sale at Vogue Fabrics and am stashed up for at least five projects. 
  • I went to my knitting circle and continued working on the pattern I'm devising. 
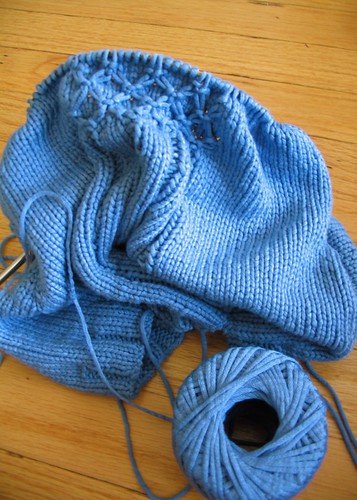
  • Smocked Tank in Progres

  • My  knitting circle decided (jokingly?) that it would be a great idea to make a calendar of knitted bikini's that we each designed. I started a Ravelry group for it - and started sketching some designs, because I think it's fun - even if no one else intends to do it.
  • I cut out one sewing project...
  • Pattern all taped together

  • and started putting it together. 
  • Preview Shot

  • I worked a rental with nearly 800 patrons on three floors with three front of house staff (not fun).
  • I watched Chicago do really well at the Tonys
  • I helped strike a set.
  • I spent 7 hours in meetings.

And that's about it - I mean, I ate and slept and went to work in the midst of all that, which was a crazy, yet really fun week and half. So I hope you'll forgive me for not posting!

Print Friendly and PDF Follow
follow us in feedly

Prize Coffee Cake


Coffee Cake Cooling

One of my goals in life is to win a blue ribbon at a county fair. Dead serious.

I have no experience with State Fairs aside from the Rogers and Hamerstein movie, so they don't particularly interest me. But as a kid I lived in the county seat - so I had to go to the fair a lot. I'm sure this isn't actually the case, but it seemed as though we had three or so major fairs at the Napa Valley Expo center a year and I was at pretty much every one.

First there were the educational fairs. There was the one my modeling clay mission was displayed at amoungst the hundreds of other missions of the pasta, cardboard, and/or lego varieties. There was the fair that they had the city-wide science fair at: my experiment on the water purifying abilities of the sun didn't even place. There was the year I volunteered to do an anti-drug puppet show at, only to find upon arrival that the "booth" contained no puppet stage and I spent several hours sitting under a table teaching kids to "Just Say No," while the woman at the next table urged people to vote no on proposition 9.

And then there was the Town and Country fair where the 4-H kids strutted their hogs and the quilts and jams were on proud display. There were games: a friend once won a guppie and then passed it off on a happy little girl and her less than happy parents; there was food: corn dogs and funnel galore! There were the rides that only one year I was allowed to ride, which included a fun house/maze that I raced though only to be incredibly disappointed when I came out the other side that I hadn't spent more time.

But missions and guppies aside, the real reason I went to fair after fair was to dance.

Anything Goes

Not at the Fair, but you get the idea. (That's me in the far right, front row)

From approximately 1988 to 2001 I was made to put on my tutu and blue eye shadow and dance with my classes in tap, jazz or ballet. The stage was unforgiving concrete and it was always devilishly hot. One year my teacher told us not to bother with wearing foundation, it'd just melt it off. I love dancing, but I hated dancing at the fair, it was uncomfortable and there was a good chance someone I did not want seeing me in a leotard would stroll by during my performance (and several have).

Spandex and sequin trauma aside, I always like the craft, food, and animal displays and I still hope to win a ribbon of my own some day.

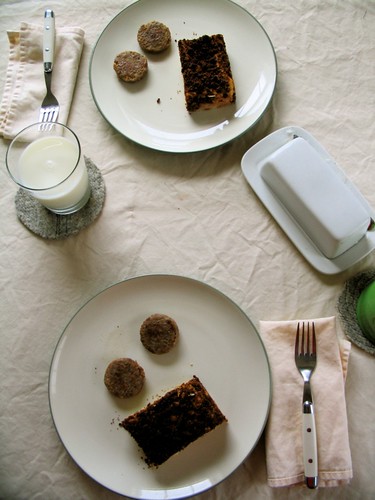
Coffee Cake and Sausage

This particular recipe won a ribbon for my family once upon a time (though the recipe card always said "prize" so I have no idea which prize it won - but if anyone in the family wants to clarify that'd be great) and so after that long introduction, I give you:

Prize Coffee Cake:


  • ¾ cup sugar
  • ¼ cup butter or shortening
  • 1 egg
  • 1½ flour
  • 2 tsp baking powder
  • ½ tsp salt
  • ½ cup milk

Topping:

  • ½ cup brown sugar
  • 2 Tbl melted butter
  • 2 Tbl flour
  • 2 TBl cinnamon

Preheat oven to 375°F. Grease and flour a 9"x9" pan. 

Mix together sugar, butter, and egg to make butter cream. It may look good, but do not sample - it tastes terrible as a college roommate of mine discovered. Add milk and mix.

In a separate bowl, blend flour, baking powder and salt. Add dry mix to butter cream. Pour into pan.

Mix together topping ingredients. If necessary add a little more melted butter until it clumps, but we wary- too much butter will cause the topping to turn molten and sink into the batter instead of staying nice and crispy on top.  Sprinkle topping on top of the batter.

Bake 25-35 minutes or until a tester comes out clean. Recipe doubles well, just add 5-10 minutes cooking time for a 9"x18" pan. 

Breakfast Aftermath

Surprise sleepy folks with coffee cake, eat all the crumbs.

Print Friendly and PDF Follow
follow us in feedly

Sweater #3 - Learning Patience

Dahlia Sweater

So I have a backlog of stuff to blog about, and now that MacB has closed, it seems more likely that it will appear on theses pages soon.

I finished this sweater about two weeks ago - the pattern is Dahlia from Knitty. The pattern was designed by a freshman in high school. This puts me to shame, so I decided to design my next sweater myself to show those uppity high schoolers. 

Dahlia Sweater


I partly chose this sweater because I though on size 8 needles, it would be a quick knit. Famous last words.

While I did finish the sweater in under 6 weeks, I had to restart this thing 5 times.

Why, you may ask - well first the raglan was an ill-explained Right Lifted Increase/Left Lifted increase. Which when I finally figured out with the help of my knitting circle (hint: when doing the left lifting increase - don't grab the stitch you just made) makes a very very pretty raglan increase line - so it was worth the trouble - but this was an exercise in patience. 

I also ignored the cries of "the thing's too big!" on Ravelry and cast on in my designated size, which by the time I hit the chest portion I realized was huge even though my gauge matched perfectly, so it got unwound for the 5th and final time.I also decided to move up the neckline an inch or so - because it was a tad low for me. After that point, though, the thing was a breeze and I enjoyed teaching myself to do the cables without a needle.


Dahlia Sweater

I totally have no patience when it comes to wearing stuff I make, so these photos are all of the unblocked (gasp!) sweater. And perhaps in punishment for my impatience - the blocked version looks about 20% better than it does in the above pictures. Another lesson learned. 

I'd like to say it's too warm to wear it now, it being after Memorial Day and all, but alas it is currently 49°F in Chicago. Le sigh...

Print Friendly and PDF Follow
follow us in feedly