5th Annual National Pie Day Pie-Luck & Blackberry Pie with Lemon Streusel

Blackberry Pie with Lemon Streusel
Serving Up Pie
Sweet Pie Sampler
Valentine's Day Cherry Pie
On the needles
Roses and Snow
HandKnitSockLove
Blackberry Pie with Lemon Streusel

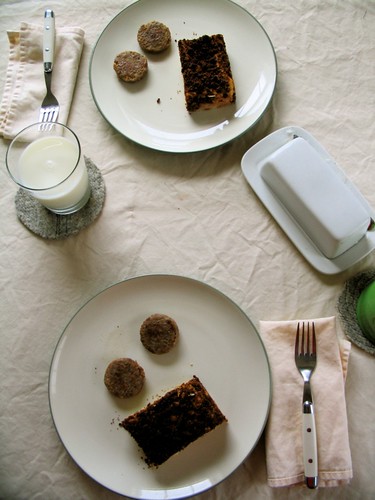
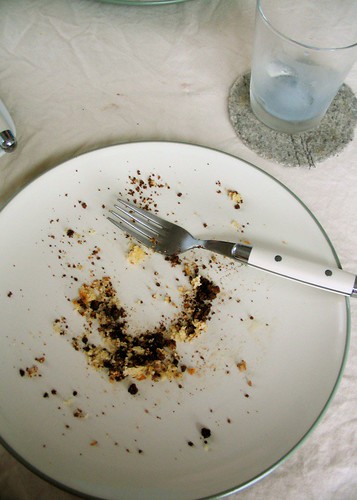
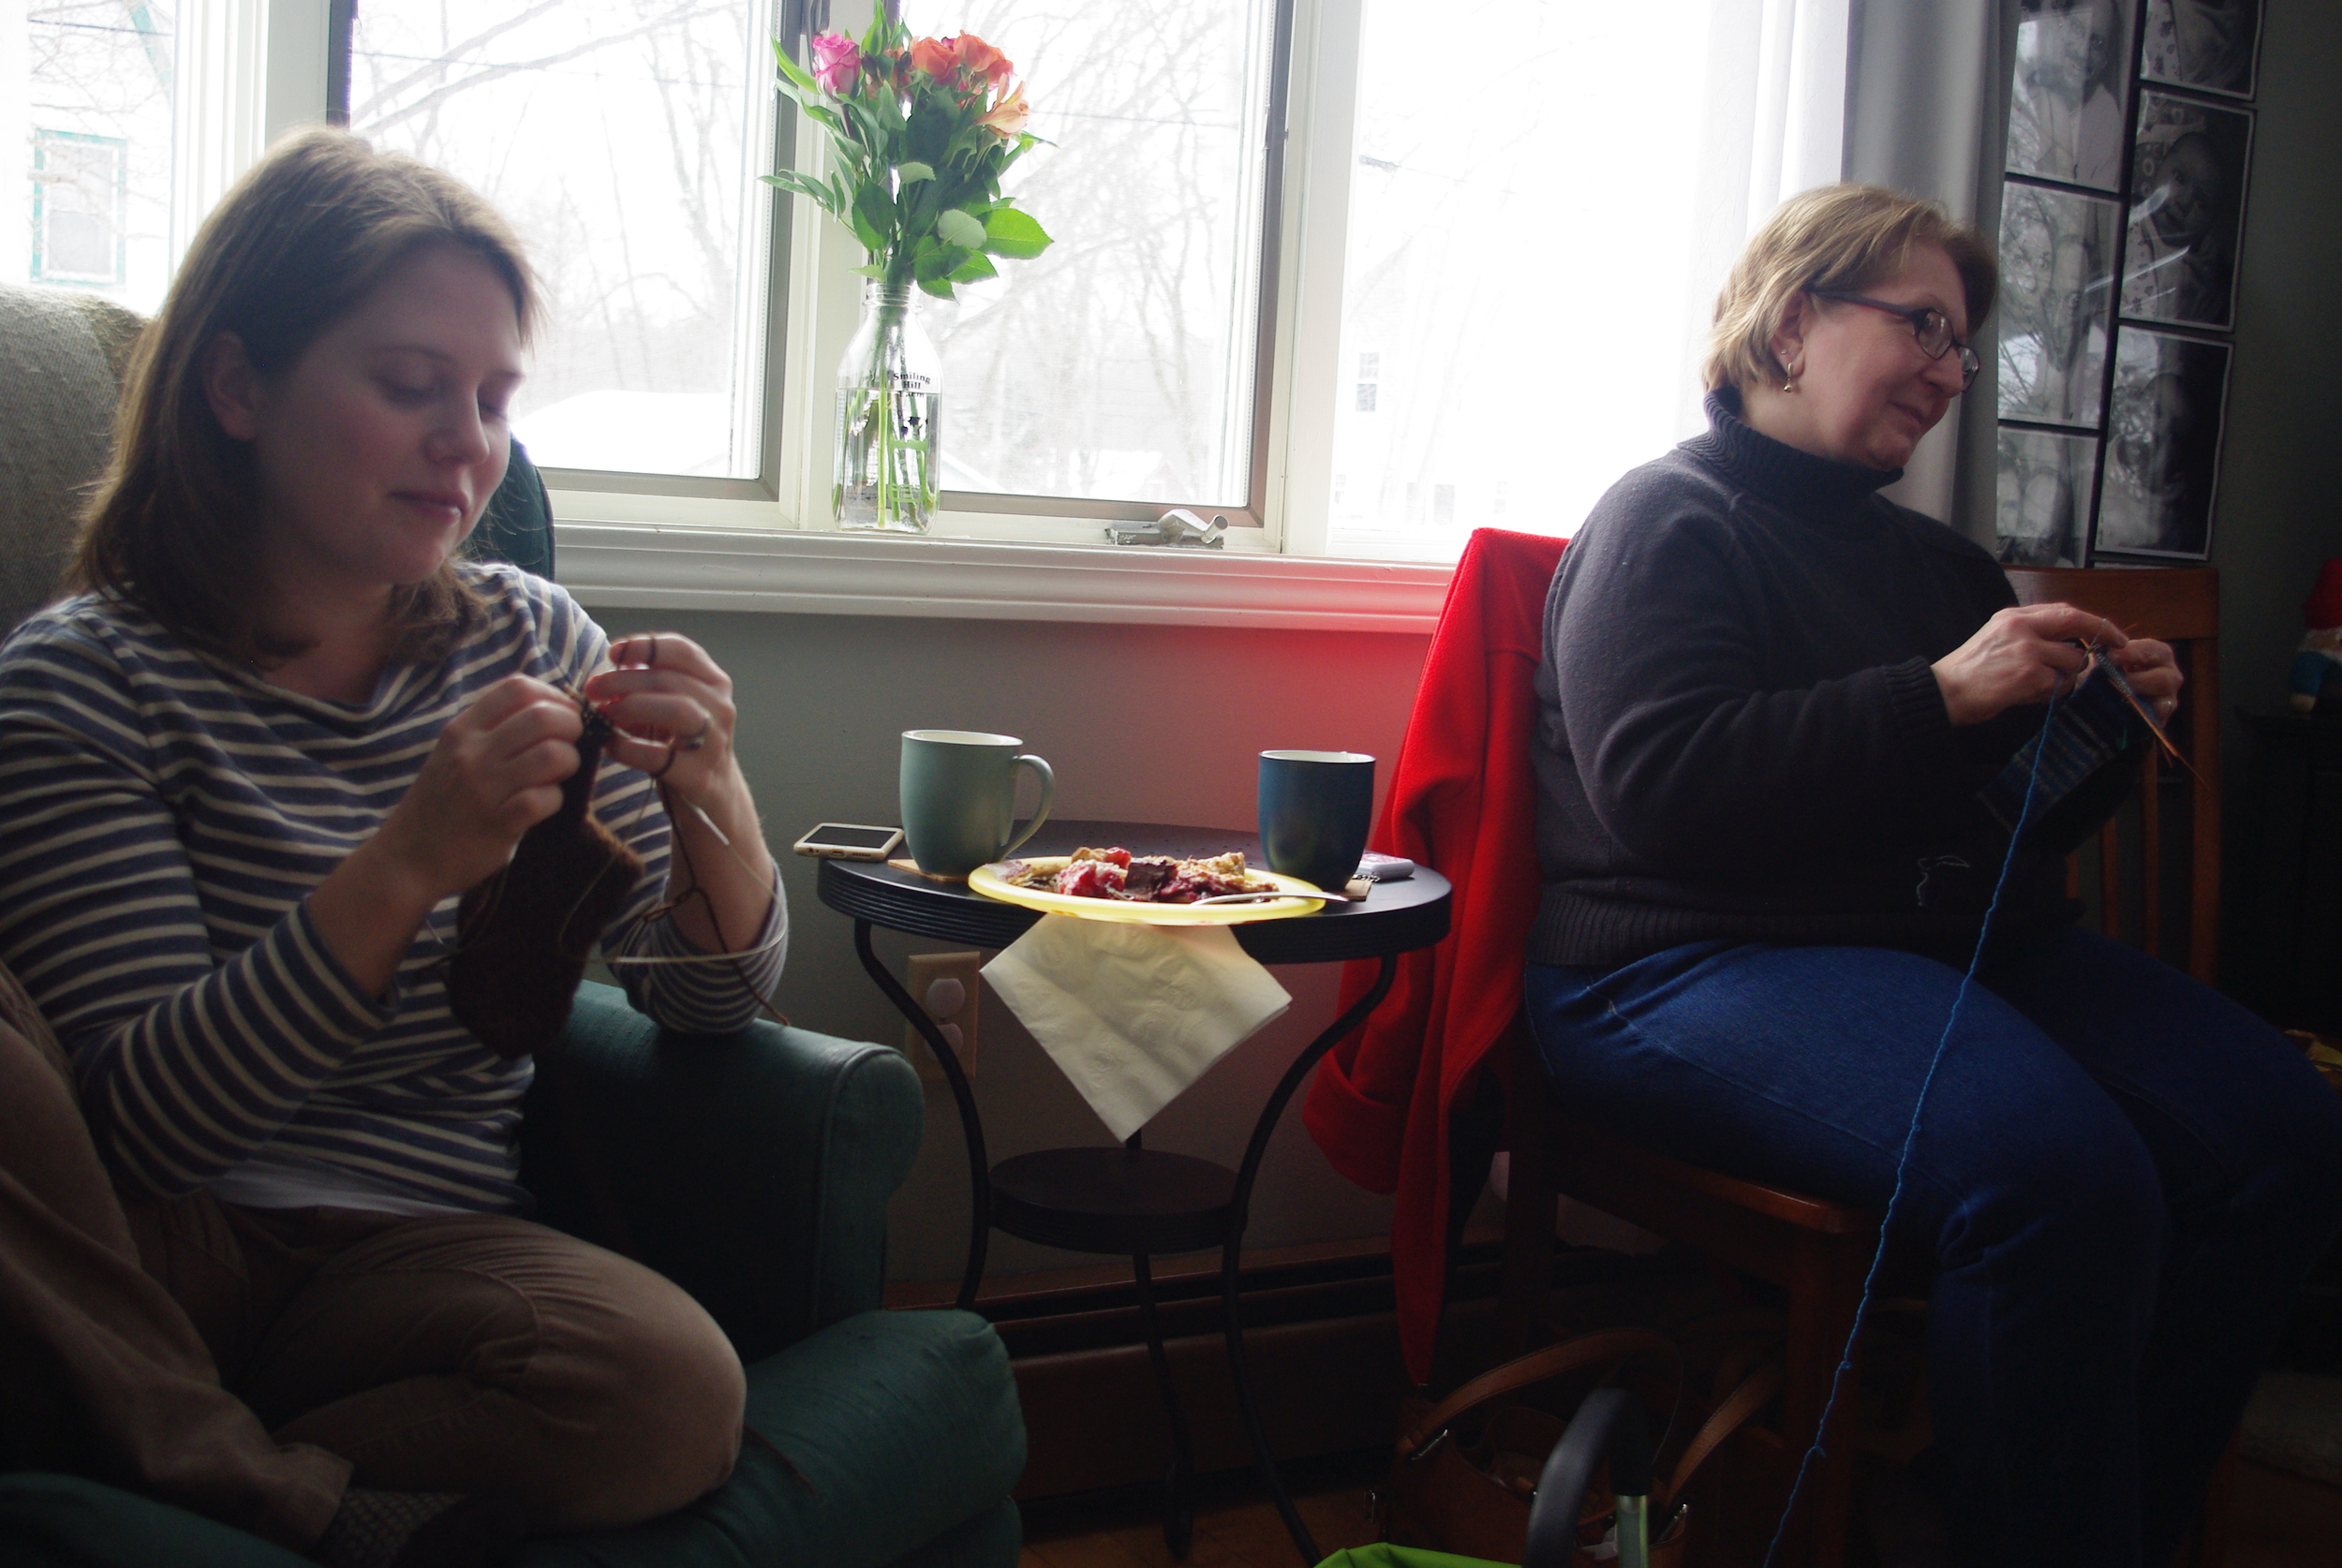
For the fifth year in a row, my knitting friend and I gathered at Casa Cleaver to celebrate National Pie Day with lots and lots of pie.

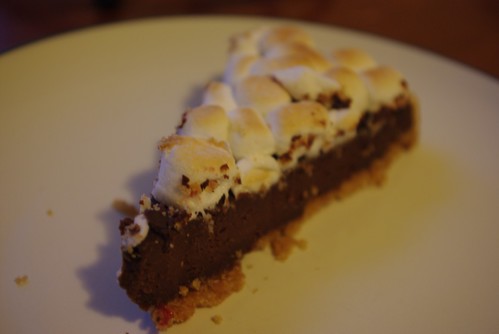
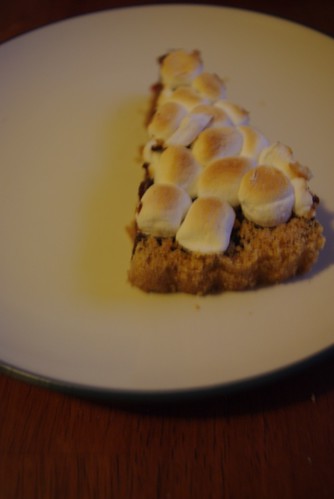
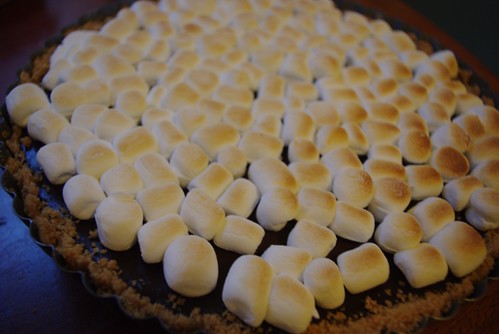
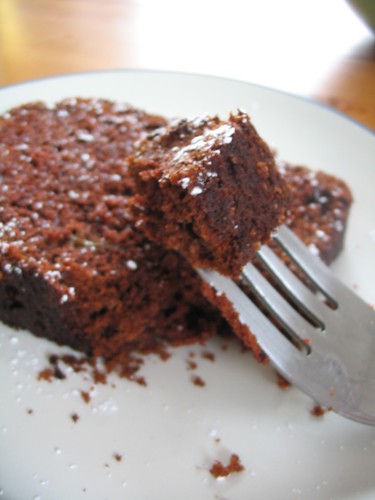
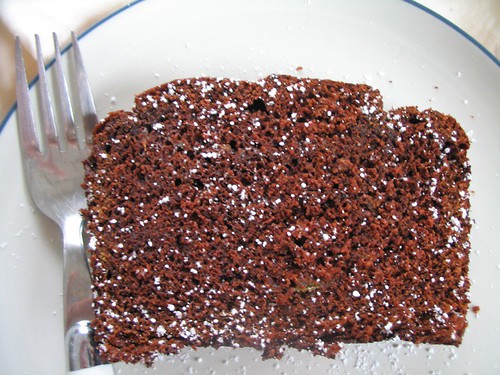
Due to the seemingly never-ending snow and some scheduling conflicts, our group was slightly smaller than usual, but we still managed to have 11 kinds of pie represented. There was a spicy meat pie, lentil shepherds pie, empanadas, cauliflower quiche, chocolate tart with hazelnut crust, nutella/banana, raspberry ribbon, ginger pear, lemon meringue, cherry and blackberry.

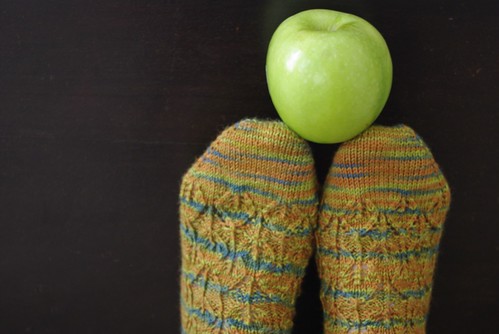
Much pie was eaten, much tea was drank, and much knitting was done. We also managed to cover all 70 toes present with hand-knit socks.

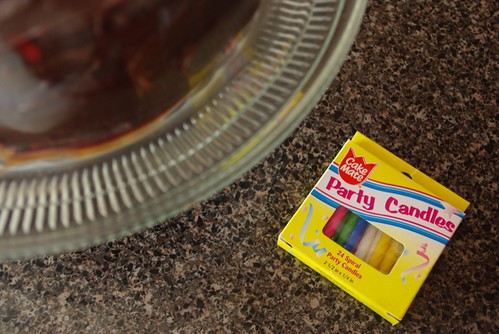
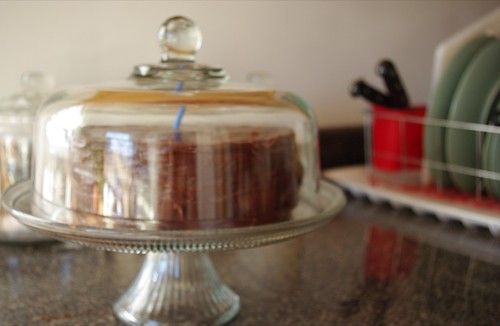
I intended to make my traditional cherry cup-pies, but due the lack of tasty ingredients in unbaked pie-dough, my baking assistant started losing interest and I went for simple(r), by making a regular pie and using a heart cookie cutter for the top crust, which would make a great valentine's day dessert, methinks.

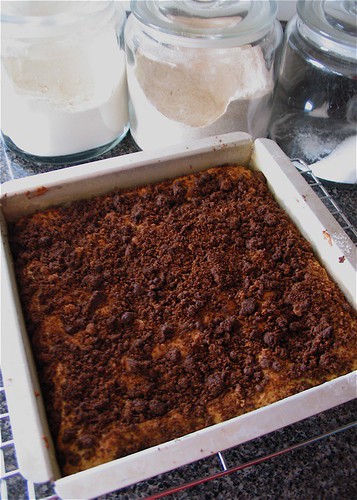
I also tried out a new recipe that I've been dreaming of for a while, inspired by my much-beloved Katie Cakes from Chicago. While I'd like to try one at least one more iteration before I'd call it final (adding a bit of cinnamon and clove to berries), it was pretty delicious, so I thought I'd share it here.

Blackberry Pie with Lemon Streusel:

Crust

  • 2 cups flour
  • 1 teaspoon salt
  • 2/3 cup shortening or unsalted butter
  • up to 1/2 cup of cold water

Filling

  • 4 cups blackberries (boysenberries would work great too), fresh or thawed frozen berries
  • 3/4 cup sugar
  • 3 Tablespoons cornstarch

Streusel

  • 1/2 cup flour
  • 1/3 cup granulated sugar
  • 1/2 stick melted butter
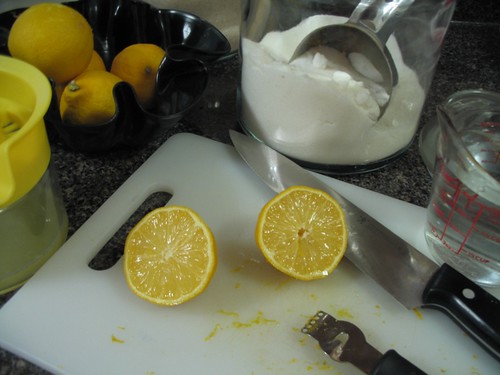
  • zest of one lemon

Pre-heat Oven to 350 Degrees F.

Mix together flour and salt for crust. Using knives or a pastry cutter, cut in shortening until mixture resembles course meal. Add cold water a small amount at a time, until dough holds together. Separate into two equal-sized balls. Flatten balls into discs and wrap separately in plastic wrap and place in fridge for about 30 minutes, or at a minimum, while filling and streusel is prepared.

Mix together filling ingredidents and set aside.

Mix together streusel ingredients in a small bowl and set aside.

Roll out chilled dough for bottom of pan. Insert pie filling. Roll out dough for top of pan, making a lattice structure is recommended.

Sprinkle streusel on top. It seems like a lot of streusel, but I'd recommend using it all as the pie expands slightly while baking.

Put in oven and bake for 1 hour, or until pie bubbles. Briefly broil top to brown if needed.


Print Friendly and PDF Follow
follow us in feedly
Share

Lemon Blueberry Muffins

Lemon Blueberry Muffins

I have a love/hate relationship with blueberries that falls directly on the low bush/high bush divide. I'll admit it, before I moved to Maine I didn't know there were different kinds, but boy is there a big difference. The low-bush or wild blueberry is a thing of beauty, small, tart and delicious. The high bush blueberry on the other hand, I feel is gritty, heavy, and lacking in flavor. In short  - I am not a fan.

I wish I could say the berries in the recipe came from wild blueberries we hand picked somewhere in a distant field (and if you know a good place to pick wild blueberries in Southern Maine, let me know - please!!), but they didn't - but they are wild Maine blueberries, and those are tasty enough for me.

Lemon Blueberry Muffins

Lemon Blueberry Muffins

(adapted from Whipped's Cranberry Orange Muffins)

Makes 12-16 muffins

  • 1 1/4 cups all-purpose flour
  • 3/4 cup wheat flour
  • 2 teaspoons baking powder
  • 1/2 teaspoon baking soda
  • 1/2 teaspoon salt
  • 1/4 teaspoon nutmeg
  • 1/2 cup (1 stick) unsalted butter, melted and cooled
  • 2/3 cup sugar
  • 2 large eggs
  • 1 teaspoon pure vanilla extract
  • zest
 of one washed lemon
  • 1 cup buttermilk (or 1 cup milk + 1 Tablespoon lemon juice)
  • 1  to 1 1/2 cup fresh or frozen wild blueberries

Preheat oven to 375°F.

If making buttermilk, mix milk and lemon juice and set aside until needed.

Grease  or line muffin cups. Combine flour, baking powder, baking soda, salt, and nutmeg in a medium mixing bowl.

Whisk together butter, sugar, eggs, vanilla, lemon zest, and buttermilk in a separate mixing bowl. With a wooden spoon or spatula, stir in the flour mixture until just combined.

Toss blueberries in a small amount of flour until coated and fold into batter. Fill each muffin cup about three-quarters full. Bake until golden and a toothpick comes out clean (20-24 minutes). Let muffins cool in pan for 5 minutes and eat warm with butter.

Print Friendly and PDF Follow
follow us in feedly
3 Comments
Share

Little Things

Some things I've been making lately:

Andersonville Socks
Basil Rosemary, Mint and Camomille
New Lunchbag
Granola!

Maple Walnut Granola:

  • 3 cups rolled oats (not quick cooking)
  • 1 cup chopped walnuts (or nut of your choice)
  • 1 cup dried cranberries (or dried fruit of your choosing)
  • 1/3 cup maple syrup
  • 1/3 cup brown sugar
  • 1/4 cup vegetable oil
  • 2 Tbl warm water
  • 1/2 tsp salt

Preheat oven to 250°F.

In a large bowl, mix together syrup, sugar, oil, water and salt until throughly combined. Add in oats and nuts and and mix until coated.  Pour oat mixture unto a  lightly oiled rimmed baking sheet or pan.

Bake from 1½ to 2 hours or until oats are dry and brown. Remove from oven and cool. Stir in fruit and place in a sealed container.

Print Friendly and PDF Follow
follow us in feedly
6 Comments
Share

S'more Pie: Take Two

S'more Pie - Perfected

Back on May 14th, 2008 I posted a pie without a recipe or a link to a recipe - it was an attempt that didn't quite work out and I hadn't gotten another chance to test out a new version.  My brother has not let me live this down. He pretty much brings it up every time we talk.

S'more Pie - Perfected

In general, I just wasn't all that inspired to give it another try, but then I had the Snicker's Pie at the Great Lost Bear and found my chocolate filling. That, along with  having my company holiday potluck today, gave me enough reason to make a second go. (Oh  - and can I say my company's Christmas potluck includes a fresh raw oyster shucking station and a pound of local shrimp is the parting gift? I love Maine. )

The tart was a big hit at the party -  it turned out exactly how I wanted, chocolately without being too much like cake or pudding and a perfect balance of flavors.  And so after a year and a half of waiting,  here it is.

Merry Christmas, Big Brother.

S'more Pie - Perfected

S’more Pie

Makes 8 to 10 servings

For crust: 8 to 9 graham crackers,  finely ground (about 1 cup) 5 to 6 tablespoons unsalted butter, melted 1/4 cup sugar

For filling: 1 1/4 cups (10 oz.) heavy cream 9 ounces bittersweet chocolate chips (not more than 65% cacao if marked)(as always, I prefer Ghirardelli’s) 2 large eggs 1 teaspoon pure vanilla extract 1/4 teaspoon salt

For Topping: Half a bag of mini-marshmallows

Equipment: a 9-inch round fluted tart pan (1 inch deep) or 9-inch pie pan

Make crust:

Preheat oven to 350°F.

Shift together graham crackers and sugar. Stir in melted butter and press evenly onto bottom and up sides of tart pan. Bake until firm, about 10-12 minutes. Cool on a rack 15 to 20 minutes

Make filling:

Bring cream to a boil, then pour over chocolate in a bowl and let stand 5 minutes. Gently stir until smooth. Whisk together eggs, vanilla, and salt in another bowl until frothy, then fold into melted chocolate.

Pour filling into cooled crust. Bake until filling is set about 3 inches from edge but center is still wobbly, 20 to 25 minutes. (Center will continue to set as tart cools.) Cool completely in pan on rack, about 1 hour.

Add topping: Distribute about half a bag of mini marshmallows on the tart, until the top of tart is evenly covered and place under broiler until marshmallows are golden brown (about 1-2 minutes, but watch carefully and rotate as needed).

Best served when marshmallows are warm and gooey! (If you don't eat it all in one sitting - and I'd be amazed if you do - it's seriously rich, store in the fridge. Let sit out until room temperature before eating and if desired, microwave for a few seconds to re-gooify the marshmallows).

In other news, last weekend I made my annual batch of peanut brittle and this photo op was too good to skip, even if my hair is a little crazy and I'm wearing one of John's flannel shirts.

Peanut Brittle

CHOMP!

Peanut Brittle

In other, other news. I'm off to my hometown of Napa, California for a week come Sunday. I haven't been back since before I was married! I may not have internet while I'm gone, but I'll let you know all about it on my return. If you're a Napa-based reader, send me a email/comment before Sunday - I'd love to meet up!

Print Friendly and PDF Follow
follow us in feedly
5 Comments
Share

Happy Harvest

When Mr. Cleaver and  I went apple picking a few weeks back, we came home with 21 pounds of apples. For two people. What did we do with them all?

Applesauce

2 Quarts Apple Sauce and 1.5 Pints Apple Butter;

Three Fat Pies

3 Fat Apple Pies;

3 apples for my mother-in-law and 3 apples for my lunch.

All in all not a bad haul! It took one day to do all the canning and another day for the pies. It was a lot of work, but I'll happily be eating apples until next September!

Though this is my fourth year making apple pies, this is the first year I worked out a recipe that I was totally happy with. In the past, my pies had ended up too watery, but with a few tweaks to some recipes from family and friends, I think we've ended up with something delicious!

Slice of Fall

Streusel Apple Pie

Crust:

  • 2 cups flour
  • 1 tsp. salt
  • 2/3 cup shortening
  • 6 full Tbl cold water

Filling:

  • 6 apples of choice ( I love jonagolds and rome beauties best - but any firm and tart apple will do).
  • 1 tsp. cinnamon
  • 1/4 tsp. nutmeg
  • 1/2 cup sugar
  • 2 Tbl lemon juice
  • 1/3 cup flour

Streusel

  • 3 Tbl butter (softened)
  • 1/3 cup flour
  • 1/4 brown sugar

Preheat oven to 400°F

Make crust by mixing together flour and salt. Cut shortening into flour mixture with a pastry cutter or some forks.  Add cold water until dough holds together. Form dough into two flattened balls, wrap in plastic wrap and store in fridge until filling is prepared.

Peel, core, and slice apples. In a large bowl, mix apples, lemon juice, sugar and spices. Add flour until a thin sauce is formed from the juices. Set filling aside.

Removed chilled dough from fridge and roll out into a top and bottom crust.

Place bottom crust in  9 inch round pie pan (metal or glass) and fill with apples, heaping up in center. Cover apples with top crust. Top can be latticed or vented with several cuts through the top.

For streusel, cut together softened butter, flour and brown sugar with a fork until crumbly. Sprinkle streusel over top of pie.

Bake pie at for 40-50 or until filling bubbles and top is brown.

Cool, slice and enjoy!

Print Friendly and PDF Follow
follow us in feedly
9 Comments
Share

Can't Say It Wasn't Memorable

Okay, so this weekend was so chock-full of wonderfullness, that I'm going to have to break it down into several posts over the next couple of days. We'll do it chronologically, starting with Thursday.

Birthday Cake

July 3 :

Mr. Cleaver's birthday.

The day dawned and I did NOT want to get out of bed, I was so groggy that I was the worst wife ever and forgot to say Happy Birthday to Mr.Cleaver - who after about 10 minutes decided to jog my memory. Oops!That said, as embarrassed as I was, this ended up low on the totem pole of things to go wrong that day.

As I headed off to work, Mr. Cleaver was hunkering down to watch Wimbleton on the laptop, only to discover that our internet wasn't worked, only to call our service provider and discover that the phone wasn't working wither (same company). Mr. Cleaver is probably the first to admit that he's not the world's most techno-savvy guy, and was quickly frustrated, especially when it looked like neither phone nor DSL would be repaired for a few days.

Fortunately, I was able to come home a little early from work, due to a co-worker's going-away party. So I stopped at the grocery store and picked up some ingredients for the birthday cake and the manliest looking flowers I could find for my guy.

Birthday Flowers

Well, the flowers perked him up and so did my present. We also decided to go to our favorite fancy restaurant to dinner, so things were looking up. I started working on the cake, and frosting so it could cool while we were out to eat.

The cake fell a little in the center, but otherwise, seemed to be fine. We walked up the street to the restaurant only to find it boarded up and smelling of smoke. Yes, our favorite restaurant had burned down. At this point, really, we just had to laugh. And eat Chinese, which was nearby and also very good.

When we got home the internet seemed to be momentarily working and we discovered that the restaurant had caught fire in May and didn't look to be re-opening anytime soon.

I set to assembling the cake and it seemed - well -dry. I did a quick check of the reviews on epicurious and discovered I had forgotten to include 1 cup of water.

[wp_caption id="" align="aligncenter" width="500" caption="How Many Candles?"]How Many Candles?[/wp_caption]

Well, this was just perfect. Again, we could do nothing but laugh, and despite the dryness, enjoy the cake. I can't say anything about the cake itself, having not made it right, but Mr.Cleaver and I both think the frosting is to die for, so it came out all right. (It also didn't stop us from finishing off the whole thing by the end of the weekend - fresh raspberries help cover a multitude of sins).

Birthday Cake


In the eveing we headed down to the lakefront to try and see if we could catch any of the City of Chicago fireworks (they always do them on the 3rd, more on that in the next post).

Not exactly what I would have wished for my husband's birthday, but you can't say it wasn't memorable.

My New Go-To Chocolate Frosting from Nana Edie's Devil's Food Cake

  • 1 ½ cups sugar
  • 1 cup heavy cream
  • 4 oz unsweetened chocolate, chopped
  • 1 stick unsalted butter, cut into pieces
  • 1 teaspoon vanilla

Bring sugar and cream to a boil in a heavy saucepan, stirring constantly, and simmer 10 minutes. Remove from heat and add chocolate, butter, and vanilla, stirring until smooth. Transfer to a bowl and cool to room temperature, stirring occasionally. Chill frosting, stirring frequently, until thickened and spreadable.


Print Friendly and PDF Follow
follow us in feedly
1 Comment
Share

Prize Coffee Cake


Coffee Cake Cooling

One of my goals in life is to win a blue ribbon at a county fair. Dead serious.

I have no experience with State Fairs aside from the Rogers and Hamerstein movie, so they don't particularly interest me. But as a kid I lived in the county seat - so I had to go to the fair a lot. I'm sure this isn't actually the case, but it seemed as though we had three or so major fairs at the Napa Valley Expo center a year and I was at pretty much every one.

First there were the educational fairs. There was the one my modeling clay mission was displayed at amoungst the hundreds of other missions of the pasta, cardboard, and/or lego varieties. There was the fair that they had the city-wide science fair at: my experiment on the water purifying abilities of the sun didn't even place. There was the year I volunteered to do an anti-drug puppet show at, only to find upon arrival that the "booth" contained no puppet stage and I spent several hours sitting under a table teaching kids to "Just Say No," while the woman at the next table urged people to vote no on proposition 9.

And then there was the Town and Country fair where the 4-H kids strutted their hogs and the quilts and jams were on proud display. There were games: a friend once won a guppie and then passed it off on a happy little girl and her less than happy parents; there was food: corn dogs and funnel galore! There were the rides that only one year I was allowed to ride, which included a fun house/maze that I raced though only to be incredibly disappointed when I came out the other side that I hadn't spent more time.

But missions and guppies aside, the real reason I went to fair after fair was to dance.

Anything Goes

Not at the Fair, but you get the idea. (That's me in the far right, front row)

From approximately 1988 to 2001 I was made to put on my tutu and blue eye shadow and dance with my classes in tap, jazz or ballet. The stage was unforgiving concrete and it was always devilishly hot. One year my teacher told us not to bother with wearing foundation, it'd just melt it off. I love dancing, but I hated dancing at the fair, it was uncomfortable and there was a good chance someone I did not want seeing me in a leotard would stroll by during my performance (and several have).

Spandex and sequin trauma aside, I always like the craft, food, and animal displays and I still hope to win a ribbon of my own some day.

Coffee Cake and Sausage

This particular recipe won a ribbon for my family once upon a time (though the recipe card always said "prize" so I have no idea which prize it won - but if anyone in the family wants to clarify that'd be great) and so after that long introduction, I give you:

Prize Coffee Cake:


  • ¾ cup sugar
  • ¼ cup butter or shortening
  • 1 egg
  • 1½ flour
  • 2 tsp baking powder
  • ½ tsp salt
  • ½ cup milk

Topping:

  • ½ cup brown sugar
  • 2 Tbl melted butter
  • 2 Tbl flour
  • 2 TBl cinnamon

Preheat oven to 375°F. Grease and flour a 9"x9" pan. 

Mix together sugar, butter, and egg to make butter cream. It may look good, but do not sample - it tastes terrible as a college roommate of mine discovered. Add milk and mix.

In a separate bowl, blend flour, baking powder and salt. Add dry mix to butter cream. Pour into pan.

Mix together topping ingredients. If necessary add a little more melted butter until it clumps, but we wary- too much butter will cause the topping to turn molten and sink into the batter instead of staying nice and crispy on top.  Sprinkle topping on top of the batter.

Bake 25-35 minutes or until a tester comes out clean. Recipe doubles well, just add 5-10 minutes cooking time for a 9"x18" pan. 

Breakfast Aftermath

Surprise sleepy folks with coffee cake, eat all the crumbs.

Print Friendly and PDF Follow
follow us in feedly
2 Comments
Share

Marryin' Mac 'n' Cheese

Mac 'n' Cheese

So good, if we weren't already married, my husband would marry me for it.

Like pretty much all of America, I grew up on the Kraft "Blue Box" Mac 'n' Cheese. My first taste of the homemade stuff was when my brother attempted to make some while I was in high school. I not sure what happened, but it was notthe best, shall we say. I retrospect, I think it needed salt. 

Years later, I came across this recipe in Real Simple Magazine and thought I'd give it ago, but I was a little put off by the called for 6 cups (!) of milk, and using the full quarter cup of oil on the bread make my crackers waaaay too greasy, so I did a few mild changes, as listed below.

And its really good. This is maybe one of Mr. Cleaver's favorite things I cook, and every so often (as with the Cherry Pie), he'll just "happen" to the buy the ingredients and if I just "happen" to want to make it, it would "happen" to be swell. I love it too, so it's not too hard to convince me.  

Mac 'n' Cheese Ingredients

Mac 'n' Cheese, adapted from Real Simple, Nov. 200. 

  • 1 pound elbow macaroni
  • 5 Tablespoons unsalted butter (plus some to grease dish)
  • ½ cup all-purpose flour
  • 3-4 cups whole or low-fat milk (I use 1% it turns out plenty rich and creamy)
  • 14 oz.-16oz.  cheese of choice (I like cheddar or you could do a mix.)
  • 2 teaspoons sea salt 

Herbed-Crumb Topping

  • 1 cup or about ½ a sleeve of your favorite butter crackers (Ritz, Keebler Club) smashed
  • 3 Tablespoons olive oil
  • oregano and thyme to taste
  • 1 teaspoon salt
  • ¼ teaspoon black pepper

Heat oven to 400°F and grease a 9x13 baking dish.

Cook the macaroni for slightly less time than the package says, so it's still a little firm. Drain and rinse.

While the mac is boiling, combine cracker crumbs, oil, herbs, salt and pepper. The oil should be just enough to coat and make the crumbs slightly stick together. 

In a saucepan, melt butter. While whisking constantly, add the flour and cook for about 3 minutes. The mixture will clump. Still stirring, add the milk and cook for another 7 minutes, the mixture will start to get thick.  Add the cheese and salt and stir until all the cheese is evenly melted.

Mix together the mac and the cheese, pour into the prepared dish and sprinkle with the crumbs.

Bake for about 25 minutes or until golden and delicious.

It'll sit like the brick of cheese and pasta it is in your stomach, but it'll be so worth it. 

Reheats really well in the oven too! 

Print Friendly and PDF Follow
follow us in feedly
2 Comments
Share

Sunny Lemon Sorbet

Lemon Sorbet

It is 5:30pm in Chicago, sunny and 58°F. This is a cause for celebration.

And there's no better way to celebrate good weather than by pulling out the ice cream maker - one of the many wonderful and incredibly useful wedding gifts Mr. Cleaver and I received. We use our ice cream maker at least once a month, even throughout the winter, so to those who think an ice cream maker is that wedding gift that gets used twice and never again, I prove you wrong in this instance.

Now in interest of full disclosure, I made this sorbet a week ago when it was 35°, but after a long Chicago winter, when it finally hits 35 people start pulling out their shorts.

I had previously made a dark chocolate sorbet from that most wonderful of food-centric websites, Chocolate and Zucchini. It definitely a make again, but the sorbet, I think is really suited to the lightness and sweetness of fresh fruit. So, to bring a ray of sunshine into my kitchen, I opted for a Sunny Lemon Sorbet.

Sorbet Ingredients

Lemon Sorbet is maybe the easiest thing to make ever.

The ingredients:

  • 1 cup of fresh lemon juice
  • 1 cup water
  • 1 cup sugar
  • 1 tablespoon lemon zest
  • That's it! I love food with a small number of ingredients.

Mix all the ingredients together in a bowl and place in the fridge for a minimum of 4 hours, again - I always let it sit over night before I put it into the ice cream maker. This will allow the sugar to dissolve and the mixture to cool, so the machine doesn't have to work as hard.

Pour sorbet mixture into the ice cream machine and churn for about 30-45 minutes for a smooth, sweet and refreshing treat! Would pair well with shortbread cookies.

Print Friendly and PDF Follow
follow us in feedly
1 Comment
Share

Chocolate Banana Bread Cake

Chocolate Banana Bread

The way these recipes are coming, people are going to start to think that the only place I ever ate decent food was in Portland, Maine and that I don't live in a rather major U.S. culinary city these days - because, yes, today's recipe was inspired by something I ate in Portland, Maine.

The restaurant in question today is Bibo's Madd Apple Cafe. This lovely and eclectic little spot is right next door to the theatre I used to work at. Actually it's the same building. In any case, this is one of my favorite eateries in the city and exactly what I like to think a cafe should be: classier and more adventurous than a diner or sandwich/burger joint, but not so intimidating that you couldn't eat lunch there. That is, a place a low-paid twenty-something could take both her friends and her parents. The jaunty atmosphere doesn't hurt either.

The first time I went there for lunch I sprung for dessert: the ever-so-delicious Chocolate Banana Bread Pudding Cake (with a warm chocolate center and whipped cream). Now as readers of this blog may know, I love me some banana bread. I also love me chocolate. So this dessert was right up my alley.

Though my Chocolate Banana Bread Recipe isn't the same as Bibo's (frankly, I'd have to try it again to get a better feeling of the dish), I'm pretty happy with how this variation turned out. This recipe is based on the aforementioned banana bread recipes and Clotilde's Chocolate and Zucchini Cake from her cookbook. I wanted a texture that was somewhere between cake and bread and this does that pretty well. The chocolate flavor is prominent, but not overly sweet and a sprinkle of powdered sugar makes a sweet compliment. I don't know if I'm completely finished with the recipe, but I've made a lot of banana bread in the past month or so, so I'm giving it a rest for now.

Chocolate Banana Bread

Chocolate Banana Bread Cake

(inspired by Bibo's Madd Apple Cafe and Clotilde's Chocolate and Zucchini Cake)

Makes 1 medium-sized loaf

  • 2-3 overripe bananas
  • ½ cup unsalted butter, softened
  • ¼ cup milk
  • 3 eggs
  • 2 tsp lemon juice or vinegar
  • 4 oz. unsweetened baking chocolate melted and mixed with 1/2 a cup of granulated sugar (or 4 oz. of chocolate chips).
  • 1¼ cup all-purpose flour
  • ¾ cup wheat flour
  • ¾ cup brown sugar
  • 1½ tsp baking soda
  • ½ cup unsweeted cocoa
  • ½ tsp salt
  • powdered sugar (optional)

Preheat oven to 350° F

Break up the bananas and butter into a large mixing bowl. With a sturdy whisk, mash together the butter and bananas until mixed well - the butter will still be a little chunky, but should be about pea-sized. Add eggs, milk and lemon juice, adding the juice last. Pour in the melted chocolate and mix well.

In a separate bowl, mix flours, brown sugar, cocoa, soda, and salt. Add to wet ingredients and mix well. If desired, you could add some unmelted chocolate chips at this point. Pour into a greased loaf pan.

Bake 55-60 minutes, or until tester comes out clean. Dust with powdered sugar and serve.

Print Friendly and PDF Follow
follow us in feedly
Share